Statement of Intent
I intend to make this website an accurate representation of my journey as a photographer, starting off with the theme of 'Texture'. All photos I upload to this site will be appropriately placed in galleries with my opinion on which photos are to the best standard and which require improvement. I shall be exploring both natural -such as fruits and vegetables- and manmade -such as buildings and metal- textures with the intention of showing how I am dedicated to this project and how I am exploring all areas I can. By the end of this unit, I hope this website demonstrates how I have improved with my work.
I think it is important for me to look to professional photographers for inspiration. A 'Texture' photographer I am interested in researching is Ansel Adams. I had heard of him before I became interested in photographer, yet I did not have knowledge of any of his work. I feel like Ansel Adams had a big impact on the world of photography, so I feel as if I could really benefit from looking into how he worked. His style is quite different to mine as I like to add colour to my work and he is a very black and white artist, however I think it is good to be interested in different interpretations of art. I will also explore the work of Edward Weston as I think he really explores the technical aspect of photography. For example, I think he is really invested in including the rule of thirds in his work and I admire that he takes those things into consideration. The third photographer I may take inspiration from is Sandra Bartocha. Her photographer is my favorite out of the three as she incorporates colour. I can clearly see that she puts a lot of thought into the way she frames her pictures and it makes you more enamored by them. She has a more modern interpretation of things, which will make it easier to take inspiration from her work.
When this theme was chosen my mind was immediately interested in manmade textures. The intricate designs of some buildings or fences has always fascinated me as it shows what art humans are capable of. When I actually started exploring the possible outcomes of how this website would turn out I thought about how some of the vibrant greens of nature would be an amazing juxtaposition to some of the macabre greys of manmade structures. I knew I couldn't just focus on of of the two options (Manmade or Natural), so I started coming up with ideas to incorporate both styles into my project as both have breath-taking sites to offer. Creating mood boards and mind maps of different man made and natural textures would be a great way to show my research of exploring texture.
I intend to complete photoshoots indoors and outdoors. Going out on location is an important criteria as a photographer if I want to further my skills and knowledge of different types of photography. Vast places to explore such as Padley Gorge are vital for capturing the essence of nature on camera. The Padley Gorge district is a quiet and environmental place, so a good contrast to that would be going into a structural, busy city; for example the center of Manchester or London. Although it is very good to observe the world to take photos, I think indoor photoshoots with our own resources are a good way to demonstrate what we can do with limited items. When indoors, we can manipulate studio lighting, which can be a fun experiment that also creates great images.
I will most likely begin my project with photographing environmental aspects, such as trees and leaves. I may also begin with a photoshoot of fruits and vegetables as they have lots of vibrancy and it will be fun to investigate how the different camera settings react to the colours. The progression of my work I believe will be obvious when I begin to invest time into searching for things to take photos of; going out on location would be a good way to branch out. I hope to take lots of photos to have extras to experiment with on sites such as photoshop.
I am going to be using different kinds of equipment for this project. The majority of the time I will be using a Canon DSLR manual camera. These cameras have the ability to change the lenses and have lots of good settings that I can experiment with in taking photos, for example the ISO, White Balance, and my personal favorite the aperture. I will also be using my phone camera to take pictures on my own to show that I constantly observe for a perfect picture. Trying to take photographs in my own time is very important as it is much easier to expand my knowledge if I am actively looking for my own environments to venture in. Phone cameras and the Canon lenses are quite different in their abilities, so it is going to be fun trying out different effects each camera can achieve. Photoshop will also be a resource I use frequently as they have a number of different tools that can enhance the settings I have used on my camera. For example, adjusting exposure, contrast, saturation are just a few tools that will help tweak my photos so that they are of an even higher standard.
I went into this project knowing little about photography, so I hope to learn multiple things. For example, I hope to learn about how to find different settings on the camera that will apply with the environment. I also want to learn about how to properly critic my photos and how to act on criticisms by my teachers and peers, so I can always improve. During the months that I have to complete this project, one of the biggest things I want to master using is photoshop. In my opinion, it is an amazing thing if I figure out how to use photoshop correctly because even if I take a picture that I do not think is of a high enough standard, I may be able to find a way to bring it up to the level of other photos I have taken. On the plus side, showing that I know how to use photoshop or photopea is an exceptional way to make my website look more professional.
Edward Weston Research
Composition
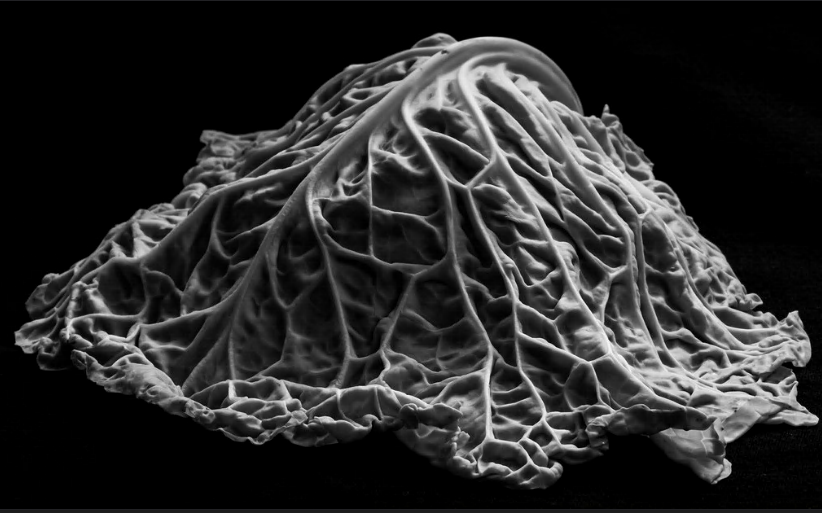
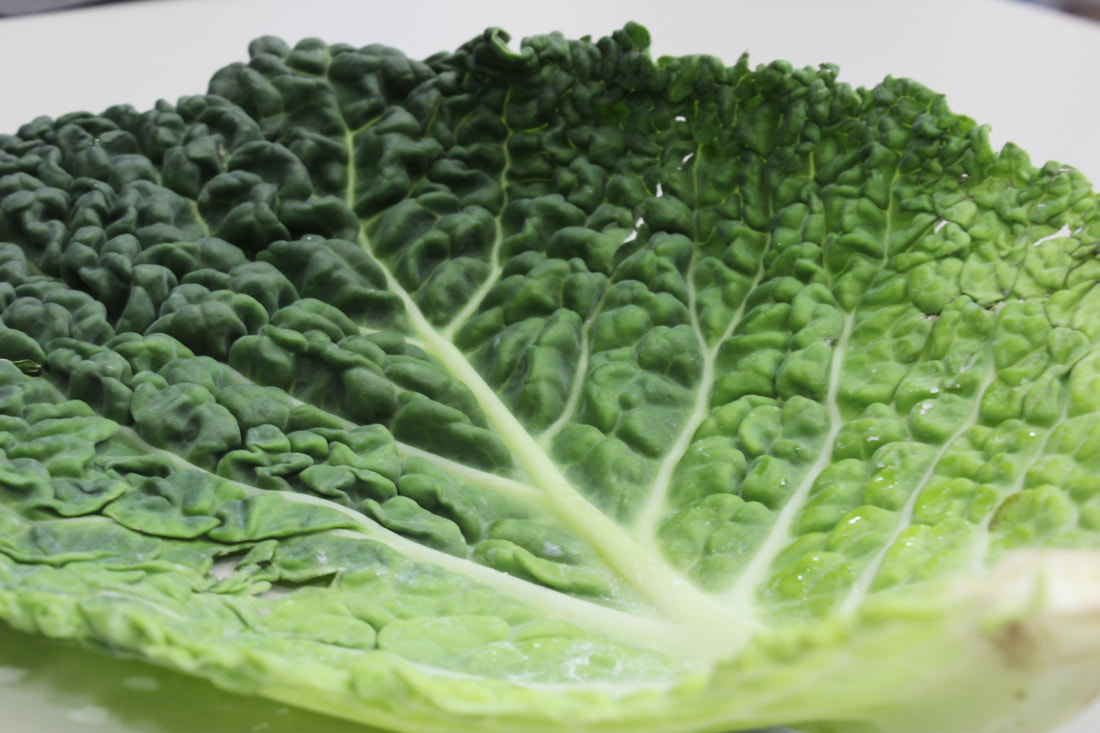
This image was taken by Edward Weston around the 1940s. The first thing which immediately catches my eye is the fact that the image is black and white. The little bumps and pieces of texture on the cabbage stand out because of the shadows created by the light. This picture looks as if it were taken in a studio with a light shining near the lower right corner of the cabbage, which creates a dark and light contrast bringing out the 3D shape. The fact that one half of the cabbage is exposed to the light and the other half is not creates a shallow depth of field. As the cabbage is at eye level, it is almost as if I can connect with the image even more than I would have if had been shot from another angle. We can see that it creates a triangle shape and because of this, my eye is drawn to the top middle where the vein of the cabbage is most prominent. The background being pitch black portrays the sense of a void and it's surrounding the cabbage as it is the only thing in the picture (Edward has used an infinity curve to create that outlook). In my opinion, the ISO looks as if it were set to about 200-400 and with the photo being taken in the 1940s, things like ISO and the White Balance would have needed to be set up manually, as digital cameras weren't produced yet. I feel like the rule of thirds doesn't apply to this image as the cabbage looks as if it is directly in the middle because the photographer has cropped it so tightly. However, I can see that Weston has made the cabbage look symmetrical to give the image the satisfying finish.
Context
"Edward Weston, an American photographer was born in Highland Park, Illinois. His works were first exhibited in 1903 at the Art Institute of Chicago. Three years later he moved to California and opened a portrait studio in a Los Angeles suburb. The Western landscape soon became his principal subject matter. The works for which he is famous–sharp, stark, brilliantly printed images of sand dunes, nudes, vegetables, rock formations, trees, cacti, shells, water, and human faces are among the finest of 20th-century photographs; their influence on modern art remains inestimable .Weston made his last photographs at his beloved Point Lobos, California, during the decade from 1938 to 1948." I found this information from: https://www.westongallery.com/original-works-by/edward-weston
Connection
We have been studying texture in class and this image is quite good at showing off the texture and the curves of the subject of the picture. We have not yet tried to use photoshop to change our images to black and white, but this picture has put the idea in my head of perhaps trying to experiment with altering images that I capture. Before I take photos I think a lot about the way I angle them and I often play around with having a lot of things eye level, so I am a fan of the way Edward has thought through about the angle of this picture.
Comment
This image is taken in a professional environment and I respect the amount of effort Edward Weston must have put into capturing it, but overall it is not really my style. I like pictures with more warm and cold colours. I like lots of splashes of vibrancy. Although I do think black and white pictures can be quite stylish, with this picture I think he could have left it in colour and it still would have been a nice picture. A sharp green shade on most cabbages (in my opinion) would have looked nice on a pitch black background.
Coggle Mind Map
Ansel Adams Reasearch
Composition
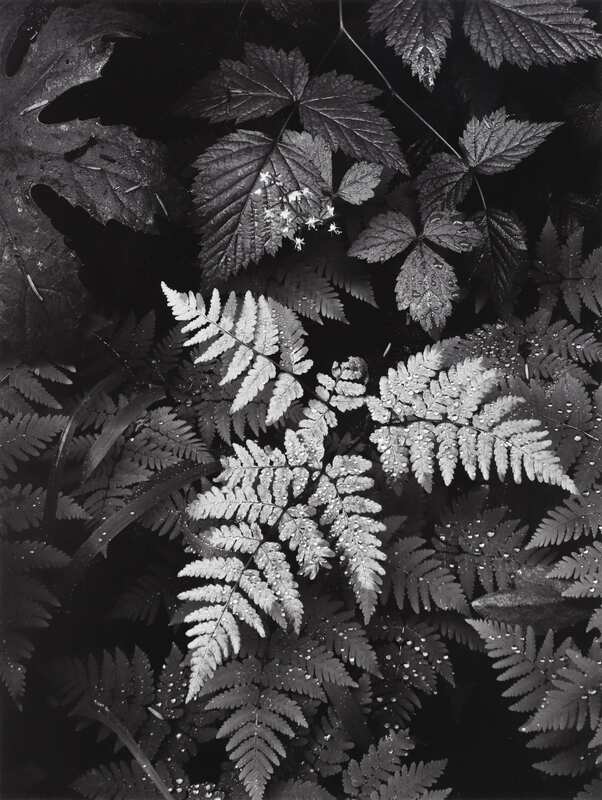
This image was taken by Ansel Adams around 1920. I immediately take note of the fact the image is black and white and because of that we can see the difference in the tone of the leaves. To me, it looks as if this photo was taken outside with natural light shining from above as the leaf in the foreground (that occupies most of the image) is very bright all around. The light from the middle is a nice contrast to the mellow, green darkness of the middle ground around it. That contrast is furthered highlighted when the very background of the image turns to complete darkness. The image creates a little bit of a 2D feel as it’s taken from a bird's eye view and looks like the pieces of nature are flat against the camera screen, but you can still the the curvature of the leaves. The placement of the leaves is quite satisfying as they are placed in a sort of chaotic way, but not so chaotic that it causes discomfort. The leaves at the bottom are cut off giving a sense of there is more than what meets the eye. The ISO and white balance would have had to be set manually as it’s very early in camera development. My eye continuously searches for the specks of rain drops on the leaves as they are very prominent and they stand out. The ISO and white balance are not very clear as due to the time period, the camera used would not have had them included. However, by todays standard I would assume the white balance is on a shadow setting and the ISO is around 200. I feel like the rule of thirds applies to this photo as the foreground leaf would be in corners of the box if the template were visible. The cropping of the image is also very nicely done as the sides are cut off, creating a sense of wonder about what is outside of frame.
Context
“Ansel Adams, (born February 20, 1902, San Francisco, California, U.S.—died April 22, 1984, Carmel, California), American photographer who was the most important landscape photographer of the 20th century. He was also a vigorous and outspoken leader of the conservation movement. He received his first camera in 1916” I found this information from:https://www.britannica.com/biography/Ansel-Adams-American-photographer
Connection
We have been looking into the texture of everything and this photo is good at showing the lines in the leaves and the shot from above is something I am quite familiar with. Photoshop has not been used to alter images yet, but it is something I am intrigued to do. Overall, I feel that the angle is my favorite thing about this picture.
Comment
I actually like the subject of the picture (the leaves) and I am a fan of how the light and dark contrasts, but I would enjoy it more if it had colour involved. I feel like the color of the leaves would have looked nice with the pitch black background. The composition of the image is nice as the lightest leaf is at the forefront of the picture.
Sandra Bartocha
Composition
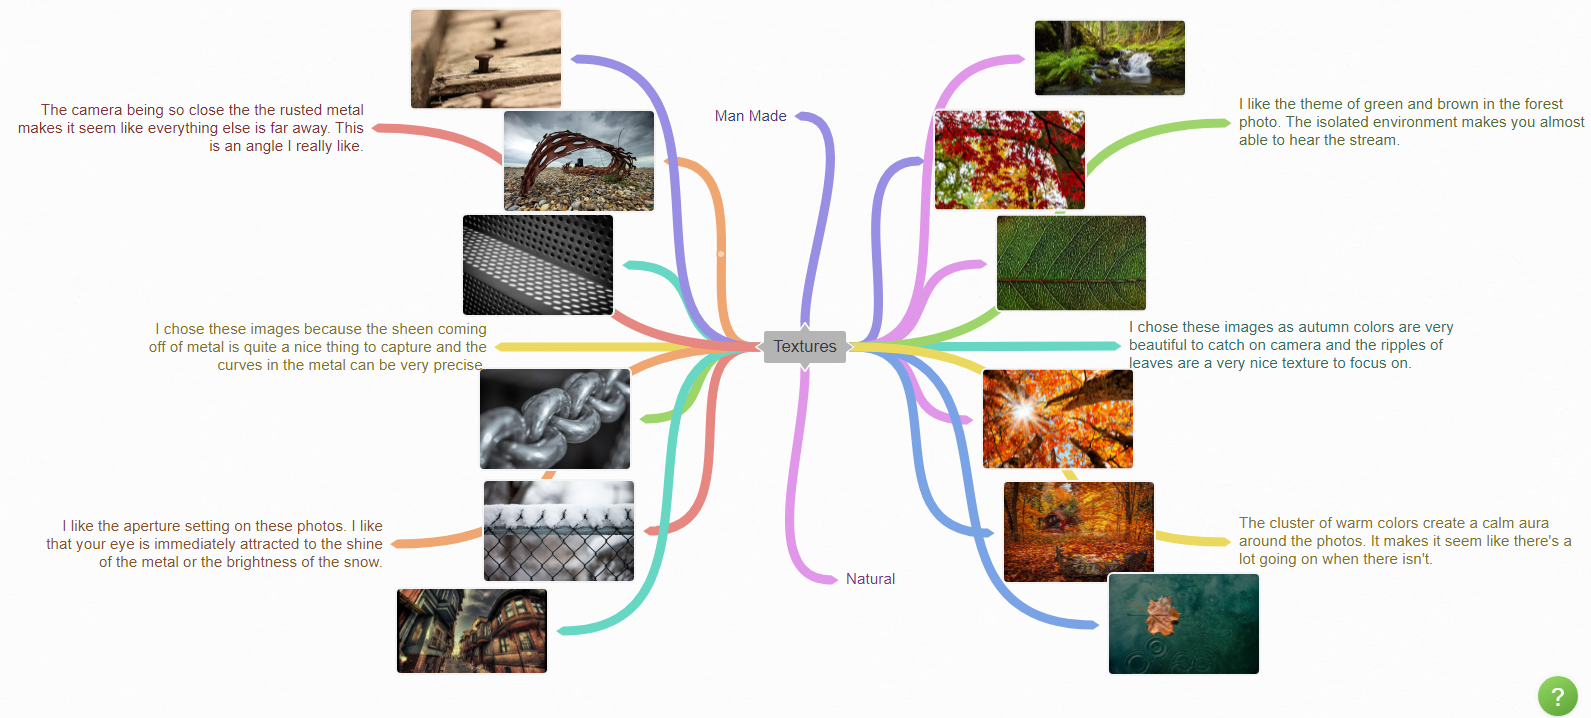
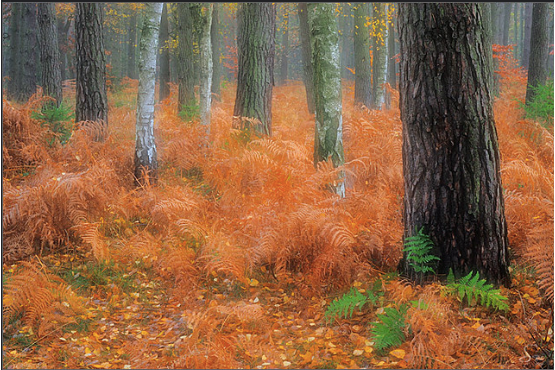
I find this image from Sandra Bartocha quite captivating. The use of the rule of thirds. On the right hand side, one specific tree is a lot closer to the camera than any other and that helps frame the photo. The photographer has made sure that tree is in the sweet spot of the frame, so that our eyes are immediately drawn to it. However, that is not the only use of the rule of thirds. In the top left hand corner a cluster of grey caught my attention. As those trees are further in the background, the colours are a lot less likely to stand out. Though, she has made sure to create a deep depth of field with high aperture settings and the Fstop was most likely set to F36 to create this. The floor of the foreground is also covered in autumn leaves which further highlight the darkness and linear pattern of the tree trunks. The image can be quite overwhelming with the bright oranges, but that is a big part of what makes it so eye catching. The contrast with the green bushes against the orange bushes has been purposely captured to make the photo really stand out. The colours are not over exposed, as the image was most likely taken in the morning which would explain the soft lighting. It creates a sort of misty look around the entirety of the image and I think that is a nice touch. The ISO setting also would have helped with the lighting outcome. The White Balance setting she chose matches very well with the timing of day. The way she has cropped the image is really smart, as the closeness makes us feel more connected to the image. If the top of the trees were in shot, the autumn colors would not be dominating the picture. So, I believe the way the camera is slightly tilted down was the best decision. In my opinion, a vanishing point is not strong in this image, but if noticed it would create a strong sense of completion within anyone who analyses it.
Context
"Born and raised in Mecklenburg-West Pomerania, freelance nature photographer and artistic wedding photographer. I'm not concerned with the general documentation of nature and landscape , but rather with the aesthetics of natural connections in detail. The only tool is the camera. For my interpretation of the environment, I use the possibilities of technology" I found this information from:https://www.bartocha-photography.com/index.php?section=about&sub_ueber=philosophie
Connection
The subject of texture is very prominent with this picture. In my opinion, her decision on the framing of the photo is perfect. Taking a landscape photo has allowed her to capture a large surface that you can get lost in. The overall majority of the photos I will take will be in color (aside from the ones I will alter in photoshop), so her use of the contrasting bright colours is very inspiring. The way the lens is so close to the environment lets us almost feel the bumps and scrapes on the trees or the crunch of the autumnal leaves. The wooded area is very similar to some of my work and the environment that she has captured will be easy to incorporate into my own interpretation. It is a very calming image.
Comment
I really like this photograph. I have always been transfixed by pictures of secluded wooden areas because you can come up with your own story behind it. I hope I am able to capture the placidity of nature in my photos, specifically the ones from my journey to Padley Gorge. The warm, dominating splashes of orange really create an essence of calmness. When the trees vanish into the background and off the side of the screen it leaves you wondering what is beyond the things that are present in the image and I think that is what makes it so wonderfully enticing.
Natural Mood board


Man Made Mood Board


Natural


Best and Worst Image
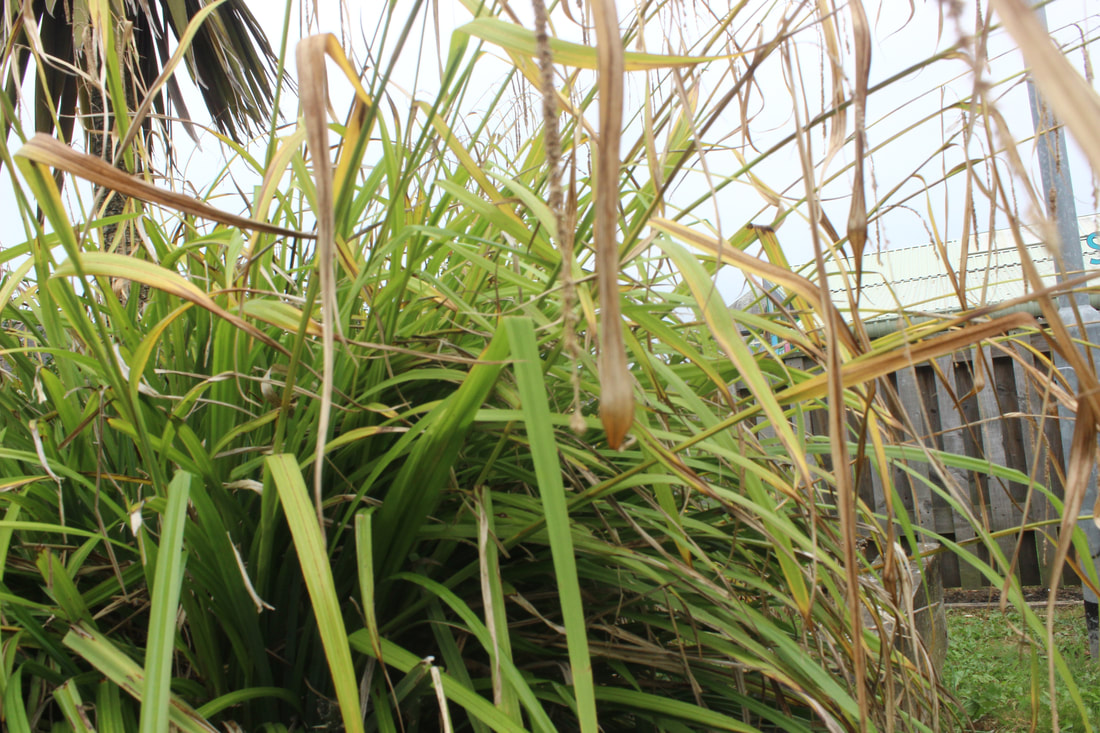
In my opinion, this is my best image because the angle makes it seem as the bush is bigger and the main focus of the image. The ISO is on the right setting for that time of day and the greens and brown of the leaves are a good combination.
|
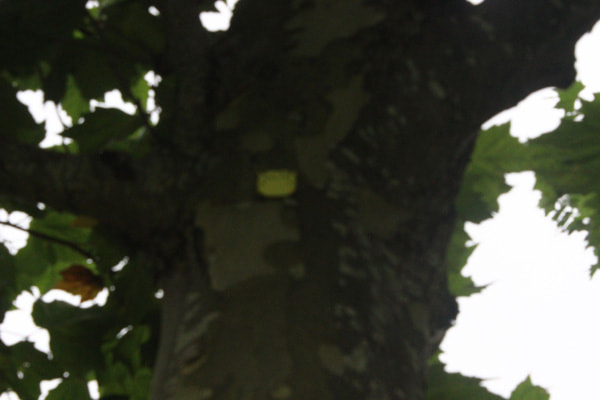
In my opinion, this is my worst image because none of it is in focus and because the bark of the tree is a dark brown, it is underexposed. I could have changed the ISO to a lower setting or taken it from an angle where the leaves are not blocking the sun.
|


Best and Worst Image

In my opinion, this is my best image because the warm colours pop out against the darkness of the table, The lighting from the sun makes your eyes go to the yellow at the bottom of the leaf.
|

In my opinion, this is my worst image because the white balance does not match the scene. It is too dark and the colours of the leaf are not able to stand out.
|


Best and Worst Image

In my opinion, this is my best image because of the way the leaves are all clustered together and there is one colour scheme of warm brown tones. It is like the camera is hidden within the leaves.
|

In my opinion, this is my worst image because the leaves are not in focus the way they are arranged could have been more spread out instead of one pile. The tables and chairs in the background are also still visible.
|


Best and Worst Image

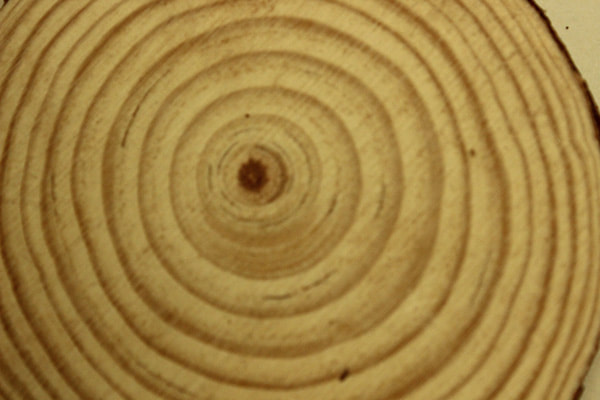
In my opinion, this is my best image because of the composition and the way the pieces of wood are placed. The aperture is just right and the lighting that was used creates the shadows.
|
In my opinion, this is my worst image because if the camera was this zoomed in I should have just captured the swirl pattern in the wood and not the edge with the bark or the white paper.
|


Best and Worst Image
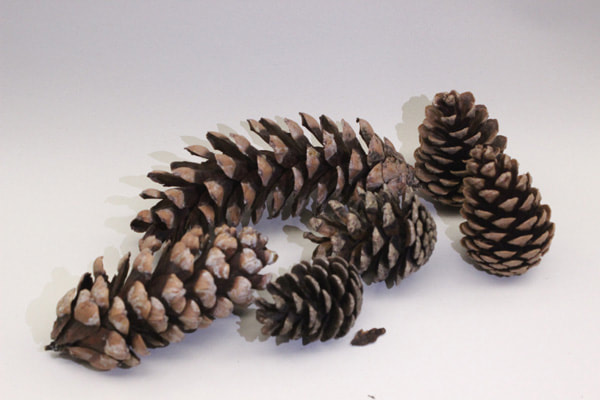
In my opinion, this is my best image because I have used the infinity curve and there is nothing in the picture to focus on, but the pinecones. You can see the shadows of the pinecones casting on the paper.
|
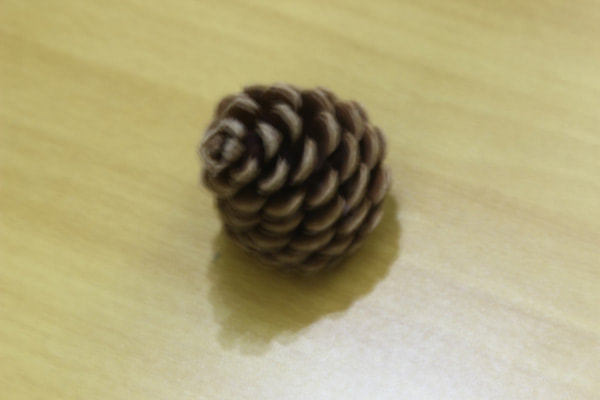
In my opinion, this is my worst image because I was shaking the camera, so the pinecone is not focused. The table is not a very good background to match with the pinecone.
|


Best and Worst Image

In my opinion, this is my best image because the green stone of the ring pops out against the bland colours of the bench. The way I have angled the camera is different. All the camera settings were just about right for this picture.
|

In my opinion, this is my worst image because the main focus is supposed to be the ring, but the wall in the background is the subject that is in focus.
|
Shoot plan
The main focus of this shoot is going to be the texture of fruits and vegetables. We did some research on the photographer Edward Weston and looked at a specific picture of a piece of lettuce. The texture and shadows of the lettuce were greatly emphasized, so I hope I can capture something like that with my images. I am hoping I can include a studio lighting of some sort to really make the fruit and veg shine. All types of fruit and vegetables will be used, such as oranges, apples, mushrooms and many more because I think it is important to photograph variety of things. As I explained, this will be a studio shoot, so a juxtaposition to this would be doing an outside shoot which would be very beneficial for any final outcomes. I will investigate the use of an infinity curve using either a sheet of paper or a board as I need to start experimenting with different photography techniques, starting out with the use of a manual camera and it's settings. The ISO and WB will most likely be set to auto and it is taking place inside, so auto will decrease risk of over exposure. Composition of the fruits and vegetables will be varied to create an interesting shot and intend to capture many different photos will many different angles to ensure the possibility of a successful shoot.


Best and Worst

In my opinion, this is my best image because the lights under the tangerine are making the juice and the texture of the fruit visible. I was able to get close enough to the tangerine, so that the aperture blurred the background.
|

In my opinion, this is my worst image because I was shaking while taking the picture. The table and the edges of the light fixture are still visible. I also do not like the angle at which the photo was being taken.
|


Best and Worst

In my opinion, this is my best image because the kiwis are in focus and the illuminating touch caused by the light is making even the miniscule hairs on the fruit stand to attention. I feel as though the aperture was put on the correct setting.
|
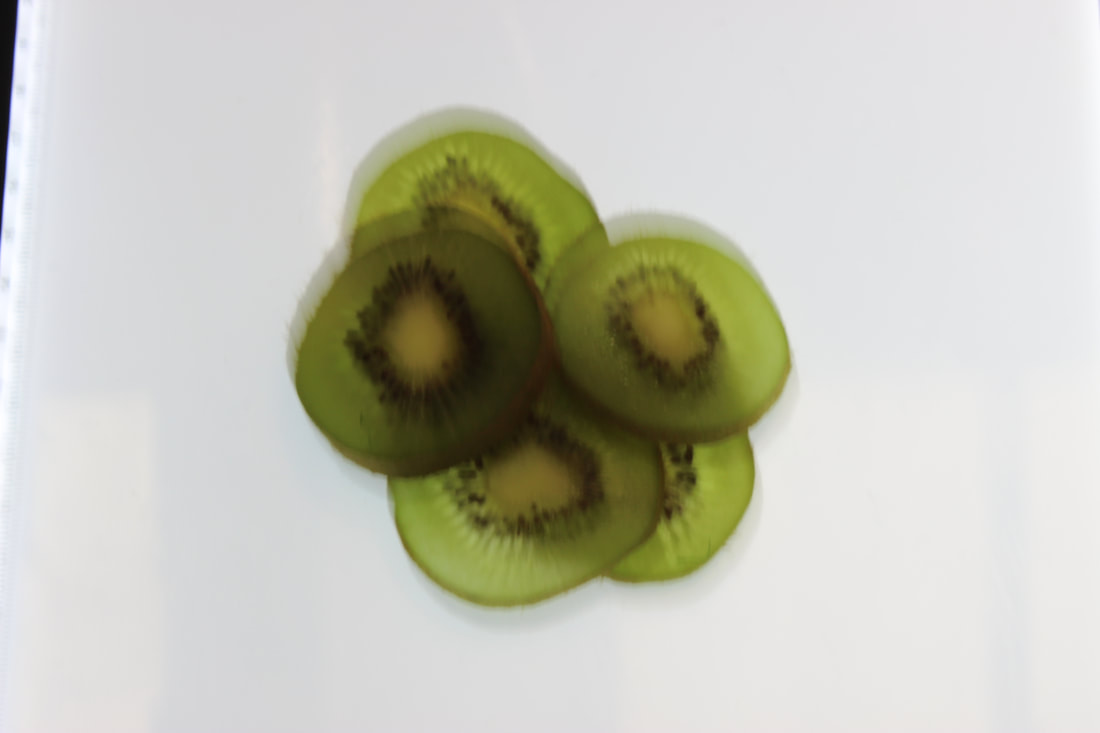
In my opinion, this is my worst image because the camera shake is very visible making the kiwis very out of focus. I am not a big fan of the composition and the one corner where the background of the room is showing is unpleasant.
|


Best and Worst

In my opinion, this is my best image. The moisture of the pineapple is very clear creating a sheen effect. I like the composition f the photo with the blurred portion of the pineapple being forefront and in darkness, whilst the focus is on the lightness. There are also leading lines in the pineapple which is very catching.
|

In my opinion, this is my worst image. It is very dull and dark. There is nothing complimenting the texture of the pineapple and the white background is looking very rough. The tag of the pineapple is in view and it adds nothing to the picture.
|


Best and Worst

In my opinion, this is my best image. Another warm undertone was created in this image. I feel the tone is emphasised by the slow changes in the shade of green. The change in focus also creates a a nice finish as each area of the lettuce gives a different vibe. The 'veins' of the cabbage amplifies the 3D feel to the picture.
|

In my opinion, this is my worst image because the camera was shaking quite a bit. The ISO was also not on a correct setting, so the result was too dark. The whole cabbage is obviously not in full view, stopping the texture from being in full effect. The infinity curve is also a little bent so a corner of the room is in view.
|
Developments
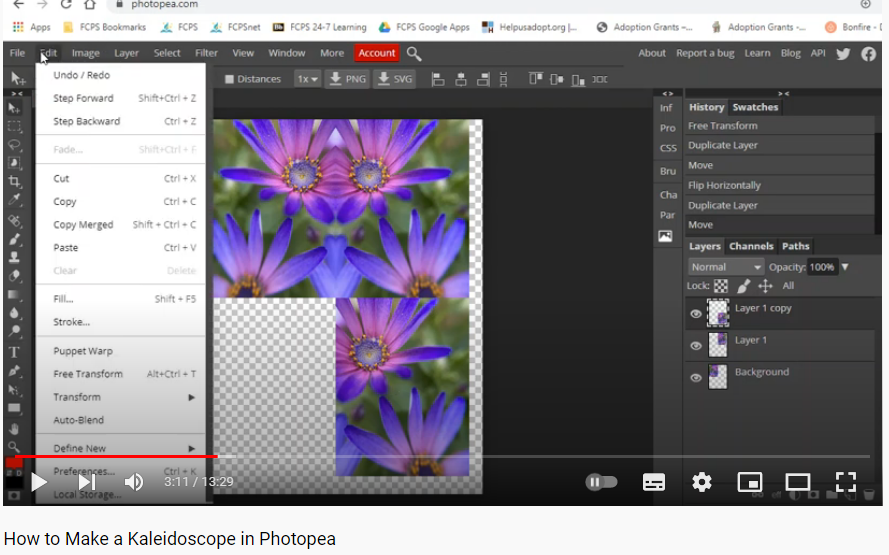
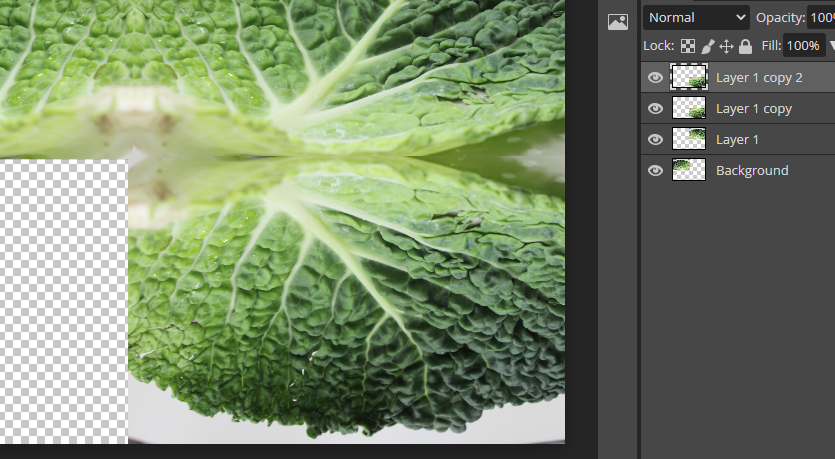
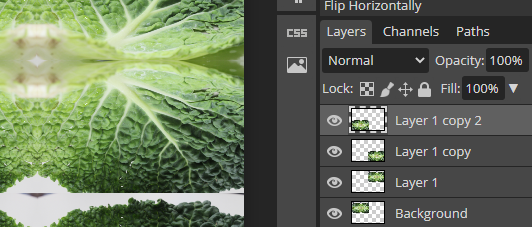
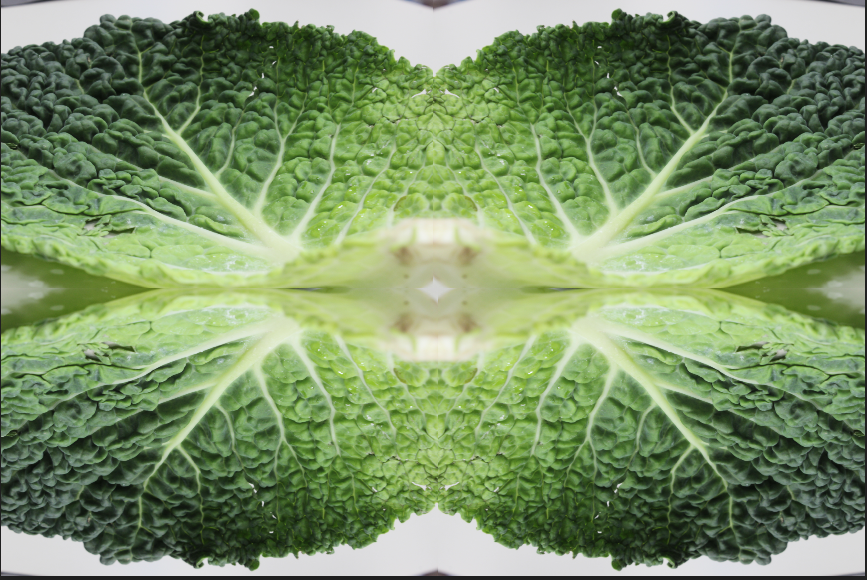
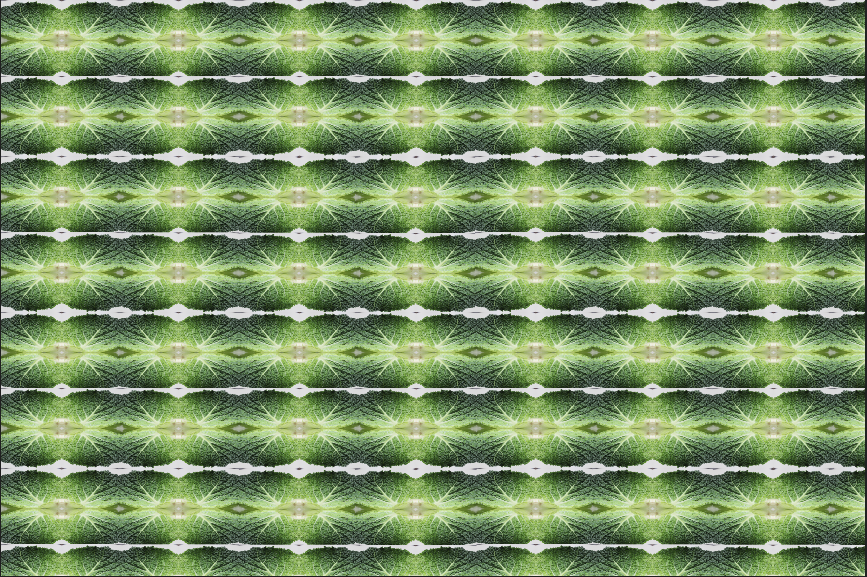
I am quite happy with the outcome of this image. I am really starting to explore different effects in photoshop. I used the tutorial below to learn how to master the effect. The kaleidoscope effect fascinates me and in my opinion is really eye catching. It looks like a puzzle who have to figure out. The process of getting the the final image is quite repetitive. For example, to keep expanding the amount of images you have to repeatedly merge the layers together and flip them. So perhaps, I could have explored some filters as well which is something I will think about next time.
Original image
|

|

|
Final Image


Best and Worst

In my opinion, this is my best image. This image has a kind of warm undertone which really highlights the texture of the mushrooms. The white outer-layer of the mushroom is really contrasting with the dark insides, yet we can still see the protruding lines within the mushroom. The aperture was around 8, creating a clear image at the forefront and a slight blur with the two mushrooms in the back.
|

In my opinion, this is my worst image. Although a large portion of the mushrooms texture is picked up in this image I feel it is too zoomed in and the placing of the mushroom is not complimenting as it is not entirely in frame. I was experimenting with the ISO and feel it was on 'shade' so the image ended up being too dark and gloomy.
|


Best and Worst

In my opinion, this is my best image because the angle coming from the bottom of the apples shows the change in colour from the red to yellow and you can see the smooth texture of the fruit clearly. There is nothing in the background distracting your eye from the apples.
|
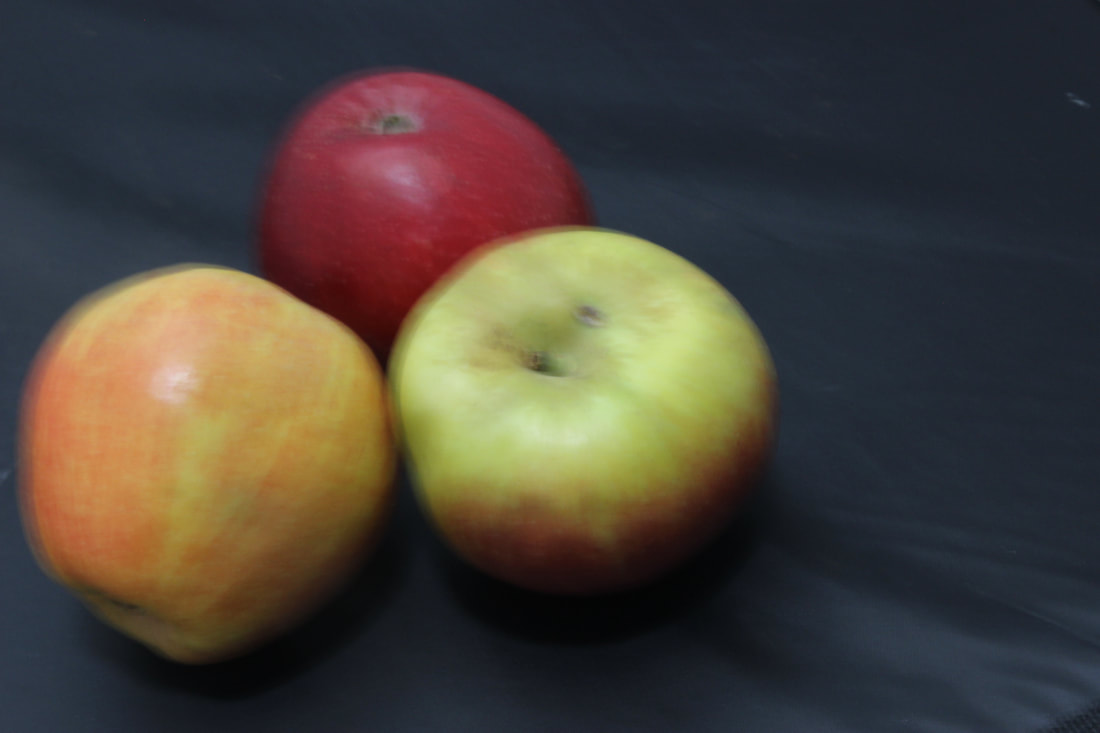
In my opinion, this is my worst image because the black background is not great at making the warm tones of the apple stand out. The camera is also very shaky and the ISO could have been changed to a higher setting.
|
Man Made


Best and Worst Image

In my opinion, this is my best image because of the tungsten light. I think it goes well with metals and with the cogs being the only thing in the image, your eyes immediately focus on them. It is a dark shade on a white shade and I think that is a good contrast.
|
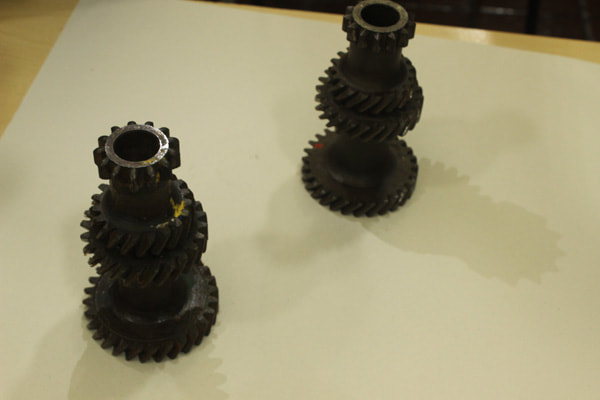
In my opinion, this is my worst image because I think the white balance could have been changed to a different setting and the table is still in shot. The cogs are just placed it random spots.
|

Best and worst

In my opinion, this is my best image because the white background accents the vibrant colours of the feathers. The aperture is right, so that the feathers in front are the ones in focus.
|

In my opinion, this is my worst image because the feathers are out of focus and the wooden table is not a very appropriate background. The composition is not right as the feathers are not the center of the image and you can still see the floor.
|


Best and Worst

In my opinion, this is my best image. I used the tungsten setting for the white balance, which I believe works the best with metal objects. The studio light was shining above the chain, but it was quite minimal; anything that might have been in the background was thankfully blacked out. The aperture setting made it so only the middle of the chain was the main thing in focus, which I really like.
|
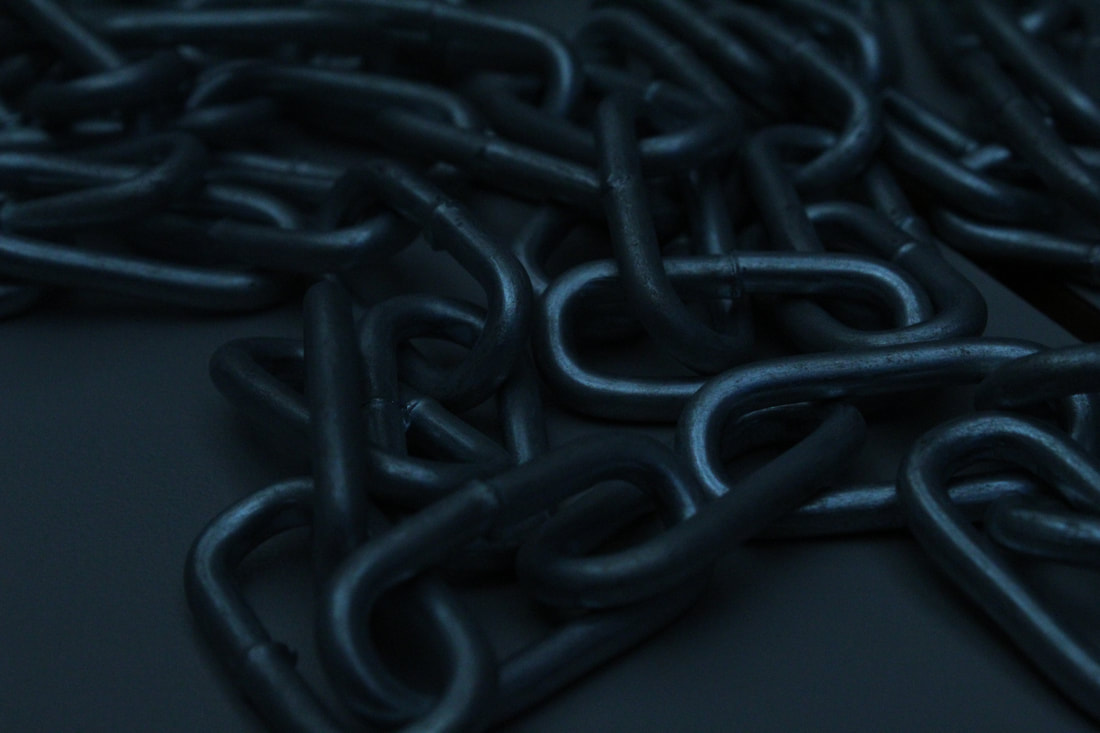
In my opinion, this is my worst image. This was one of the first images I took during the shoot, so not everything was set up correctly. The studio light is way too dark for my liking. I do not enjoy the composition of the chain (the way all of it is bunched up in one space). Setting the ISO to about 200 may have helped brighten up the picture and give it some sort of life.
|
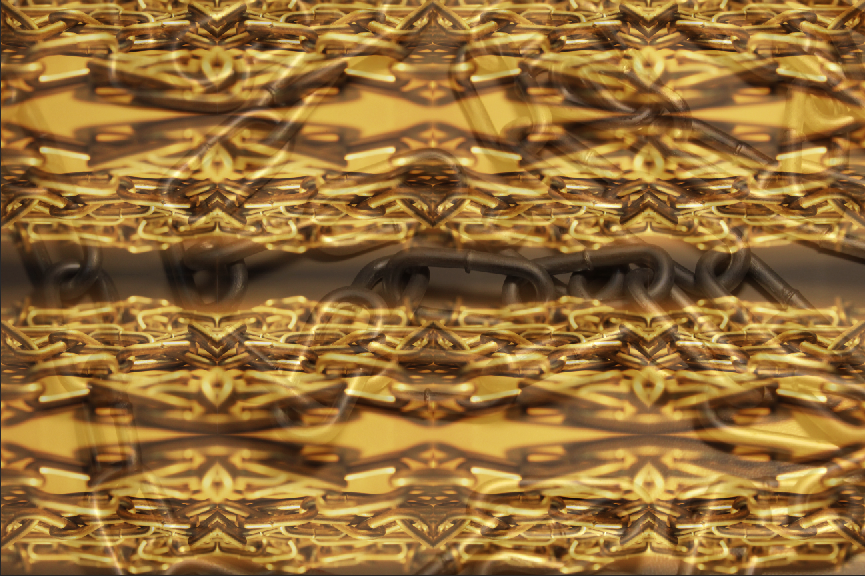
Developments
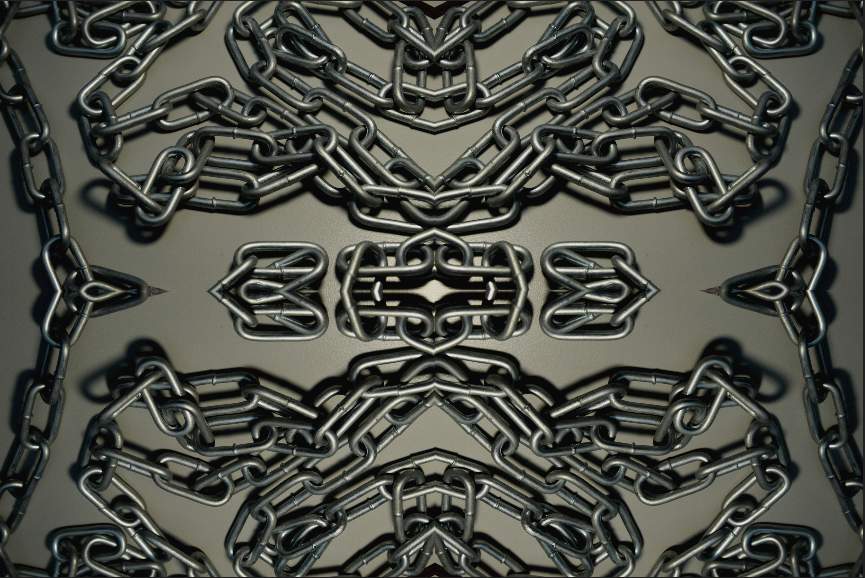
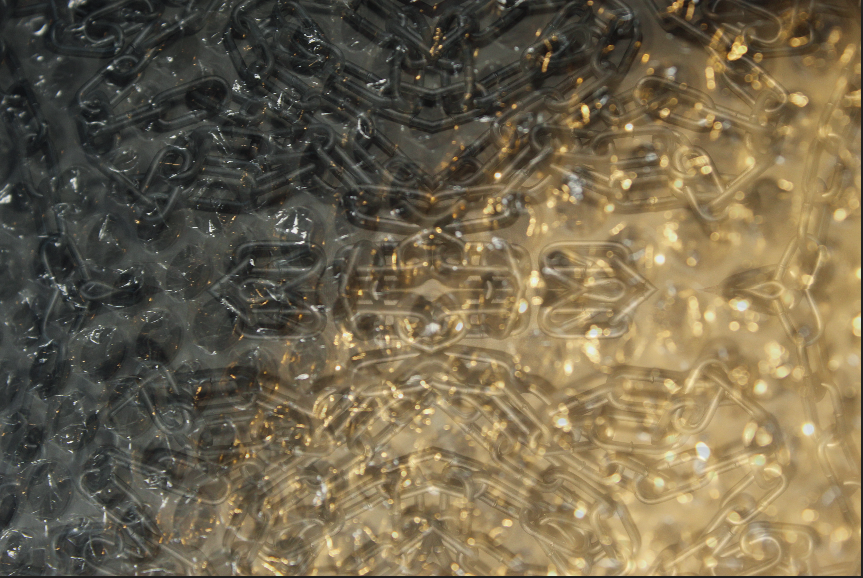
In mu opinion, the double exposure technique brings a lot more professionalism to how I am exploring with the kaleidoscope technique. I decided to not merge down the layers with the chains as I think the first set of horizontal picture looks good. The setting I used for the contrast really brings out the shadows beneath the chains, which I think really adds to the metal finish. The way the chains are lay out on the table look like a maze which I think people will find intriguing. The bubblewrap over the chains really makes them shine as one side of the bubblewrap is dark and the other is in the light. The surface of the bubblewrap showing is the perfect amount as it does not overshadow the chains.
Original Images
|
|
|


Final Images
Original images |
|


Final Image


Best and Worst

In my opinion, this is my best image. The studio light was shining right above the perfume bottle, so the light reflecting is really prominent. I love the aperture setting on this image and how all of the background is blurred out. I feel like the rule of thirds applies to this image as my eye is immediately drawn to the top middle of the bottle where there is the most texture.
|
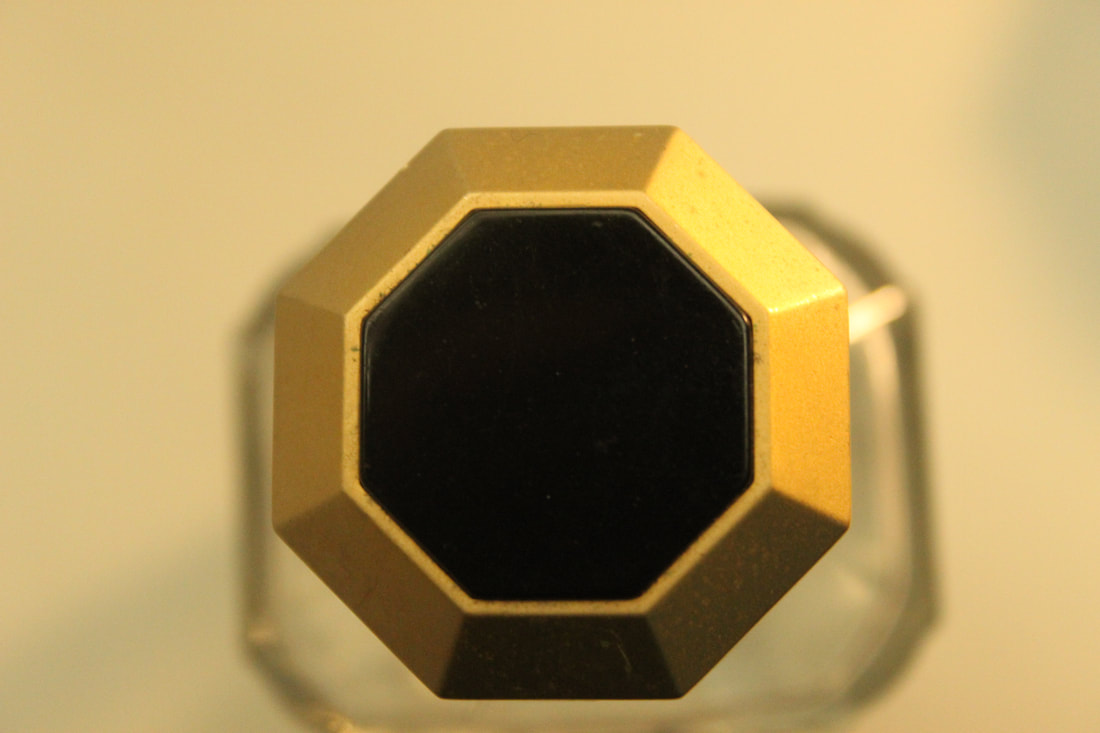
In my opinion, this is my worst image. I do not like the composition of the bottle as it is not as central as I wanted it to be. The lighting is a bit bland and there is not an exponential amount of texture on this perfume lid, so it is not a very thrilling photograph. If the WB was set to a setting like shade, maybe that would have livened up the image a little bit.
|
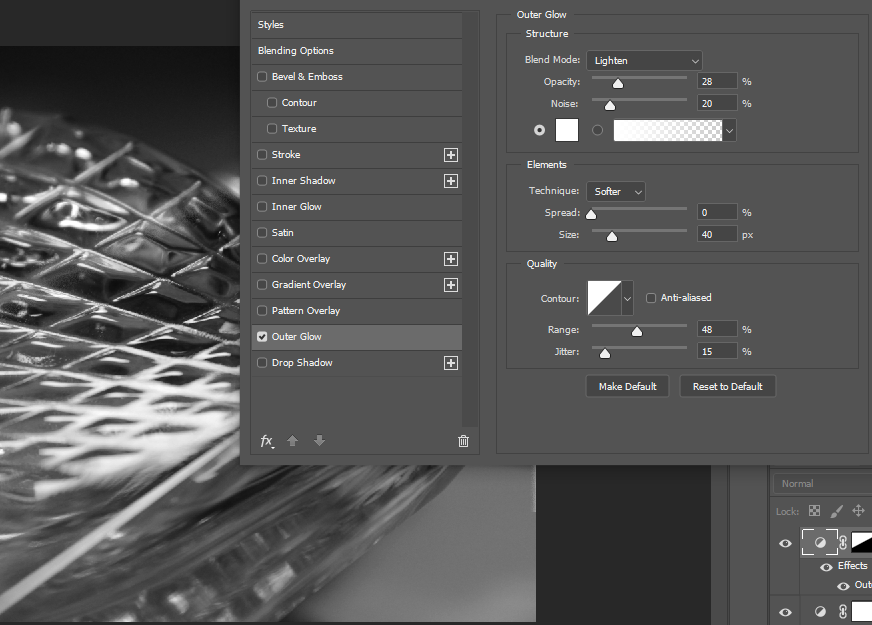
Developments
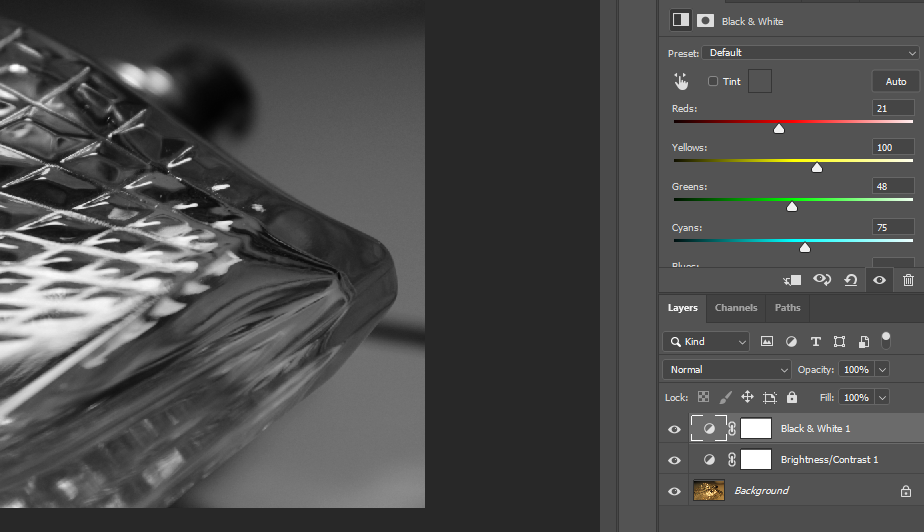
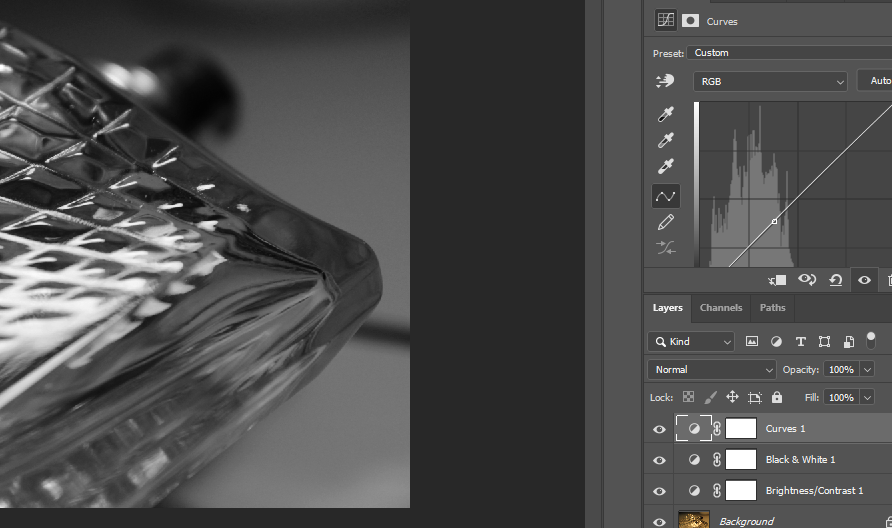
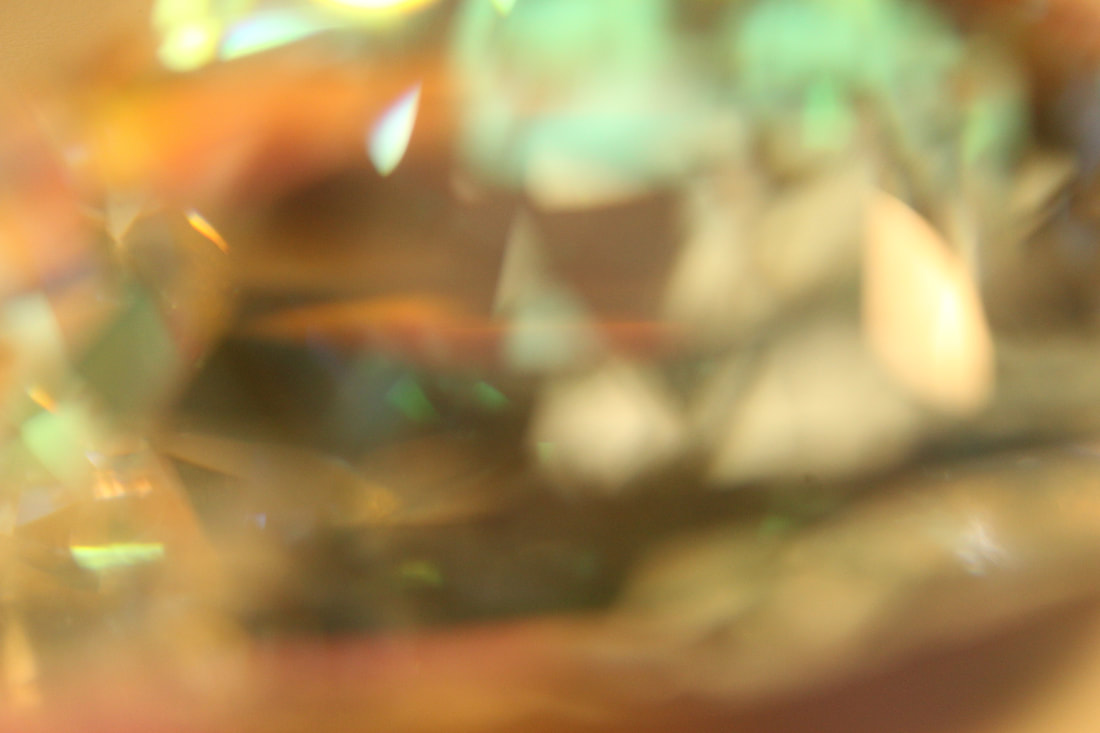
I really like the original photo. the sheen coming off of the curves of the glass creates depth. These developments are quite basic as I have only really explored changing the filter, but I still really enjoy the final outcome. The lighting in the final image is really nice as the background sort of fades into darkness and the glass is left in the white light (with a streak of lighting I added in photoshop).
Original photo
Result
|
|
|


Best and Worst

In my opinion, this is my best image. The infinity curve in the background was a great touch. The studio light to the right of the crystal made the iridescent colors really shine and pop against the black background. I like the way the crystal is slightly in focus and slightly out of focus because for a moment it comes across as if it is a smooth object, but as your eyes settle you can begin to see the texture.
|
In my opinion, this is my worst image. The picture is completely out of focus and it is an overall chaotic image. The camera lens was too close to the crystal and I think my aperture setting was too low. If the studio light was a bit further away maybe the colors of the crystal would have been more prominent.
|


Best and Worst

In my opinion, this is my best image. With no studio lighting on the chess pieces, the white and black are a really good contrast with each other. I feel like this image is very tense. I like how the white chess piece in the front is the first thing my eye is drawn to as it is the brightest and the one that is most in focus. I like the angle of the camera and how it is slightly tilted, making some chess pieces be half in shot and half not.
|

In my opinion, this is my worst image. The White Balance should have been changed. I do not like how the studio light is making the white chess pieces appear orange and how the black chess pieces are hardly even visible. The chess pieces are not in the center of the shot like I intended.
|


Best and Worst

In my opinion, this is my best image. I quite like the composition of the image (how the sphere is in the middle of the picture. The reflection inside the sphere creates levels. The top level is the green grass, the middle level is the buildings and the bottom level is the sky littered with clouds. I think there is a good contrast between those three things. The aperture was on 7.1 which I believe was the right choice as the foreground being the only thing in focus is quite eye catching.
|

In my opinion, this is my worst image. The grass is what is in focus which was not the intention. The sphere (as a result of not being in focus) does not look reflective. I do not like the composition of the image or how the camera is angled. I feel as though a different lens would have made this shoot a lot more smooth, perhaps a telescopic lens.
|


Best and Worst

In my opinion, this is my best image. I love how the bubble wrap is angled and how (from my perspective) it almost looks like it is never ending. With the lens being so close and in focus you can really see the areas of texture. The bubble wrap is not laying completely flat on the surface, so it looks as if there is a bit of life to it. In my eyes, the lighting makes the mood of the photo very calming.
|

In my opinion, this is my worst image. I did not originally intend for the table to be in the background of the shot. The entire outside layer of the picture is out of focus with only a little bit of the middle part of the bubble wrap being clearly visible. To improve, I feel as if the aperture could have been set to a slightly higher setting.
|
Developments
Once again, I am exploring using symmetry. I really like this effect, especially with this picture because your eyes get drawn to the diamond shape in the middle and then your vision starts to focus on the texture of the bubblewrap. Toying with the saturation, lighting and colour of the photo (in my opinion) was necessary as the studio light that shines through the bubblewrap really stands out as I have added a little blue tinge. It is quite a basic development and perhaps I could have added another effect on top, such as double exposure.
Original image

|
|


Final image
Developments
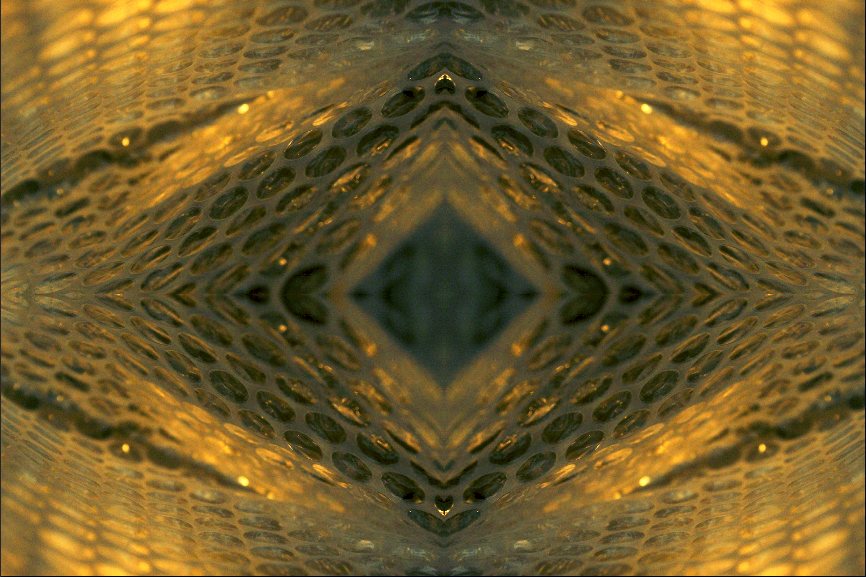
I really like what I did to alter this image. Once again, I used the kaleidoscope method and flipped the images to make them symmetrical by created multiple layers. The original image did have a little blue tint to it, so I decided to enhance that, so it could be a good contrast to the sharp yellow lighting. The final outcome is very abstract, which I think is really intriguing.
Original image

|
|


Final image
Developments
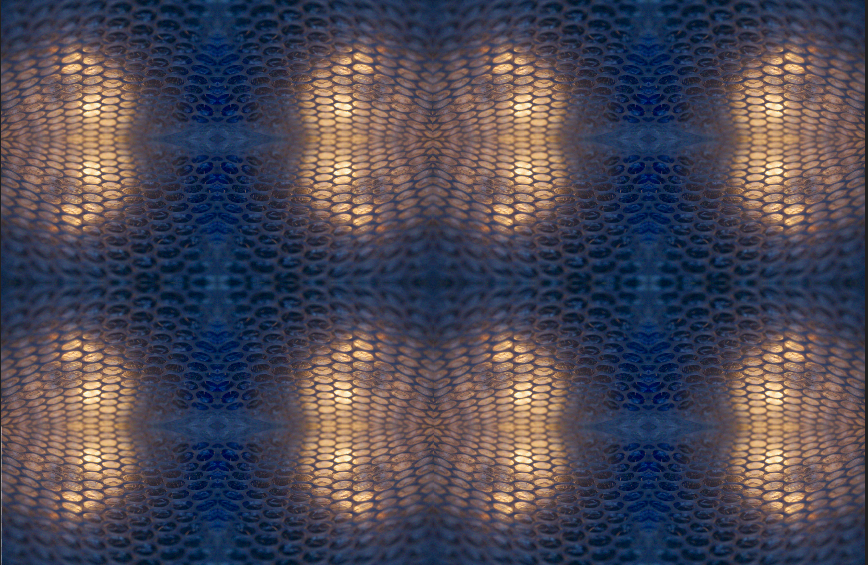
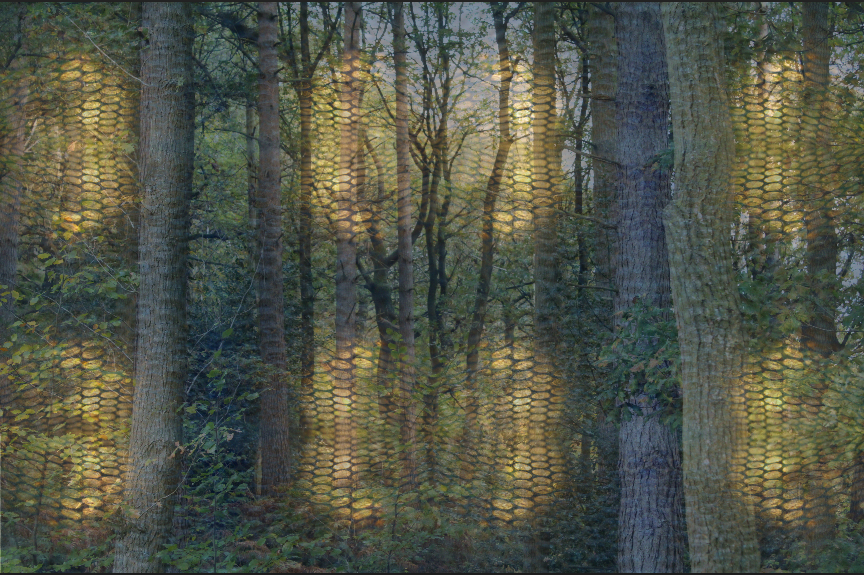
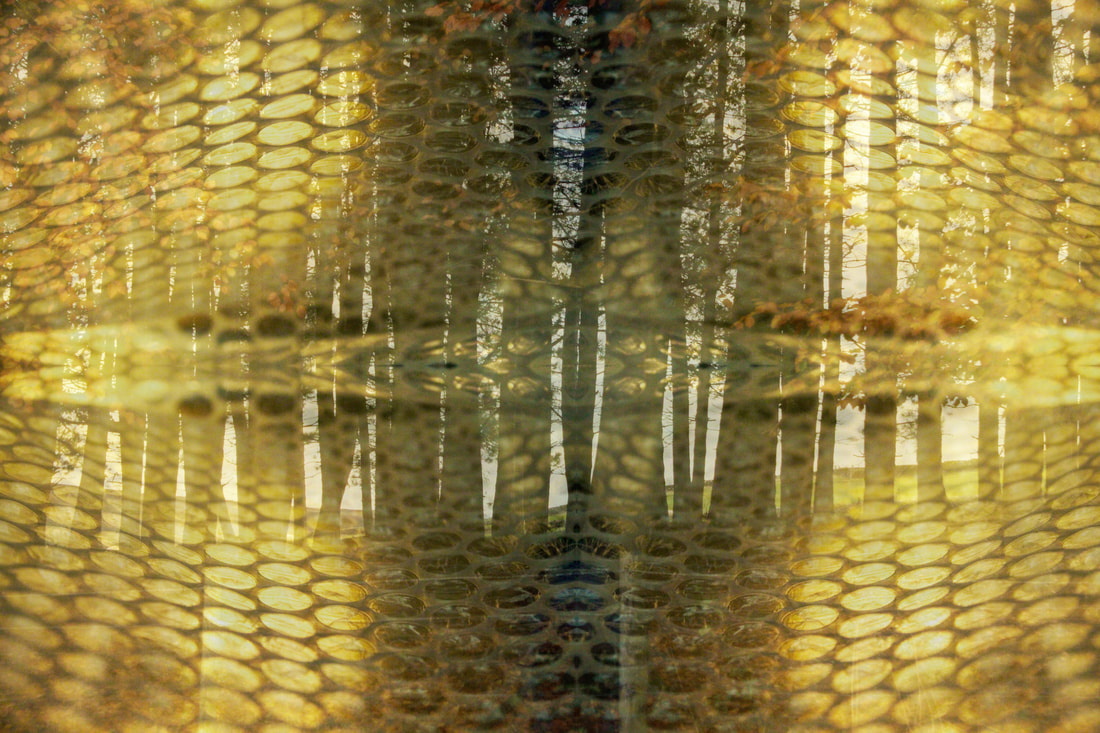
I started to explore the idea of double exposure, as the texture of the bubblewrap could add an interesting twist on another picture. I was not sure I liked the edit at the beginning of the process, but as I experimented with the opacity I began to enjoy the outcome. The enhanced lighting coming from the bubblewrap draws your eyes to the middle of the picture and the slight undertone of blue makes the background of the forest seem mysterious. I will try to expand my use of double exposure.
Original image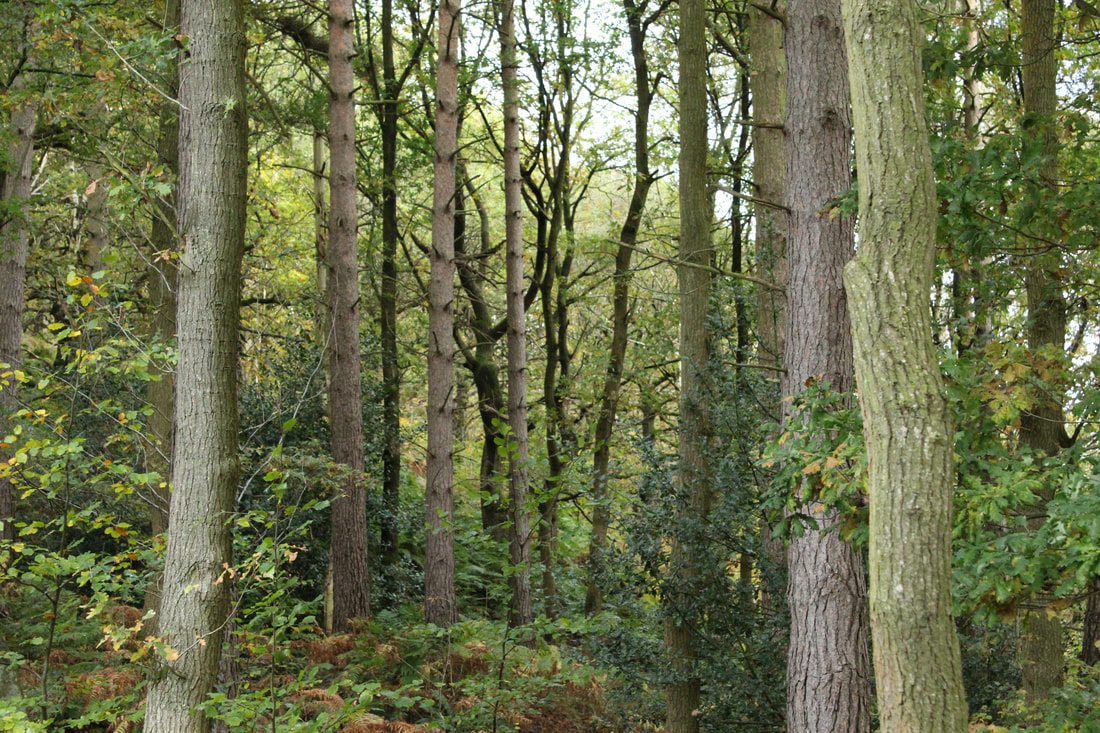
|
|


Final image
Original images
|
|
|


Final image
Padley Gorge
Moss


Best and Worst

In my opinion, this is my best image because of the aperture setting. It is quite low, so the background of the image is not in focus and your eyes immediately travel to the lone mushroom on the left. I also like the natural light in the photo and the warm undertone it gives off.
|
In my opinion, this is my worst image. The composition could have been a lot more thought out and the lighting gives the photo a grey tone, which I do not like in this context. The white balance should have been switched as I think the image is leaning towards being a bit over exposed.
|
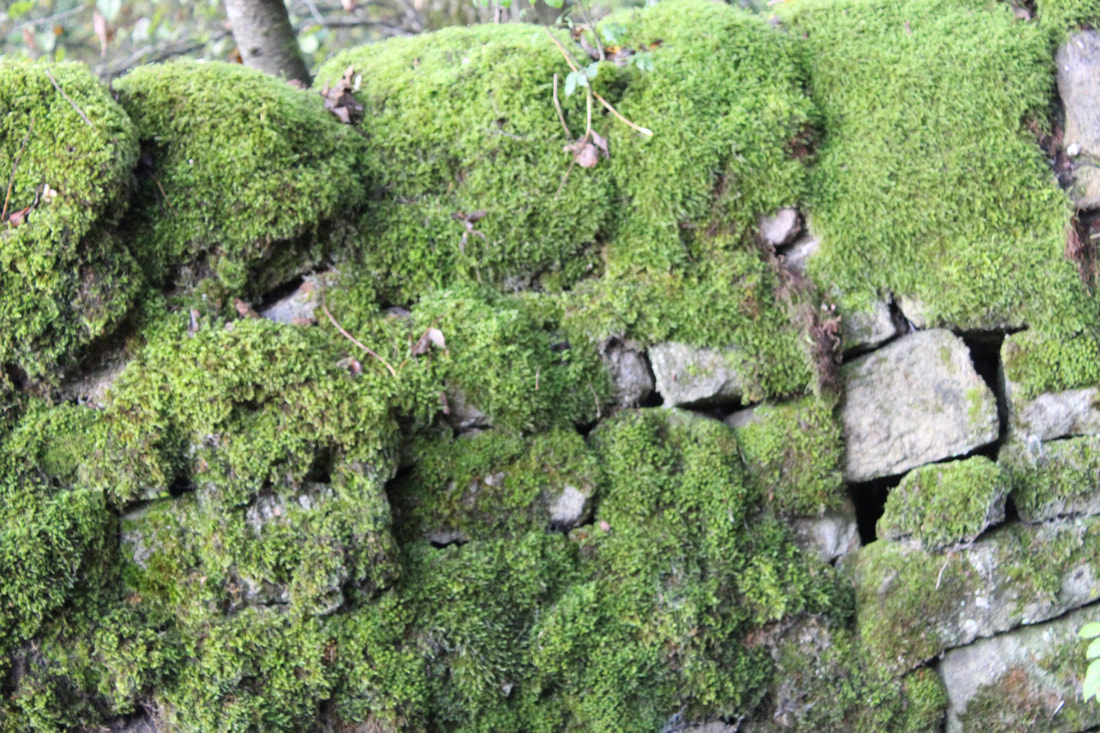
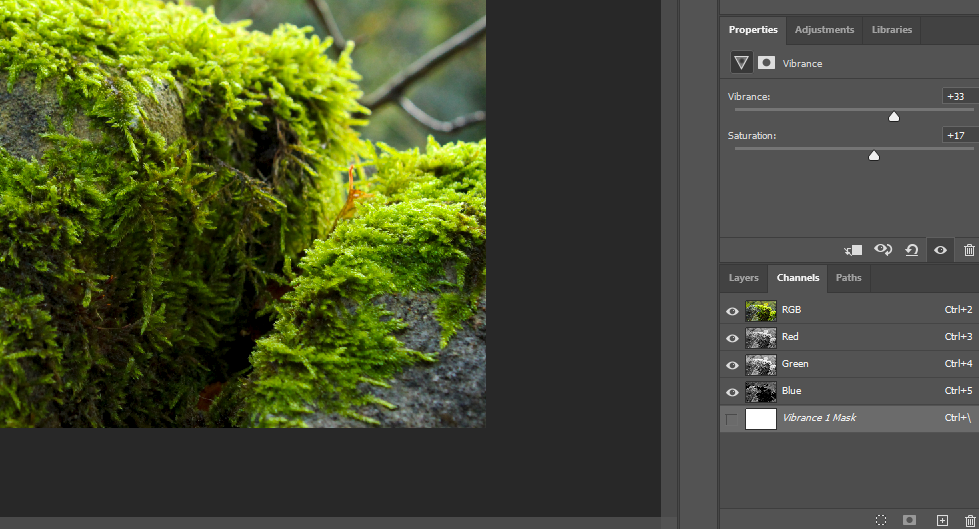
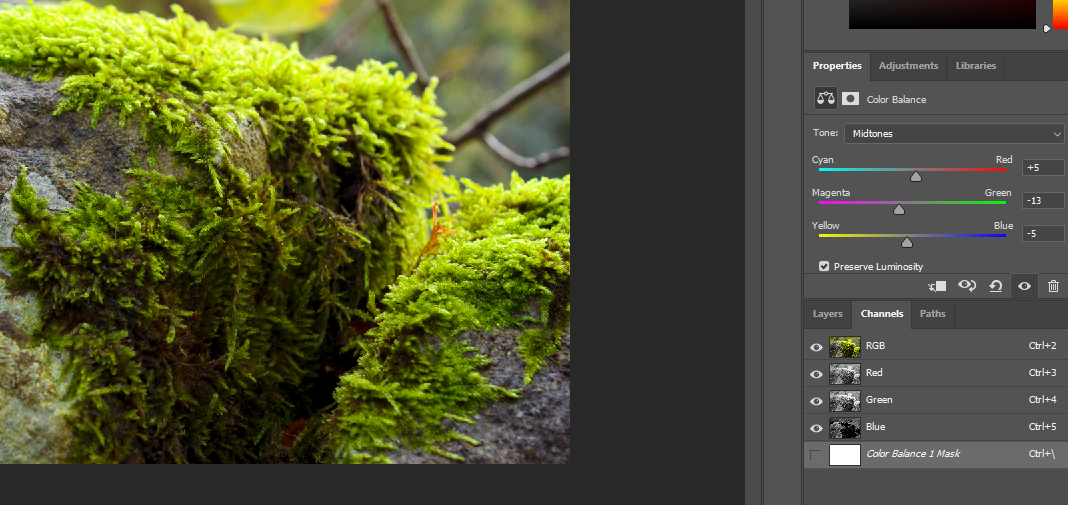
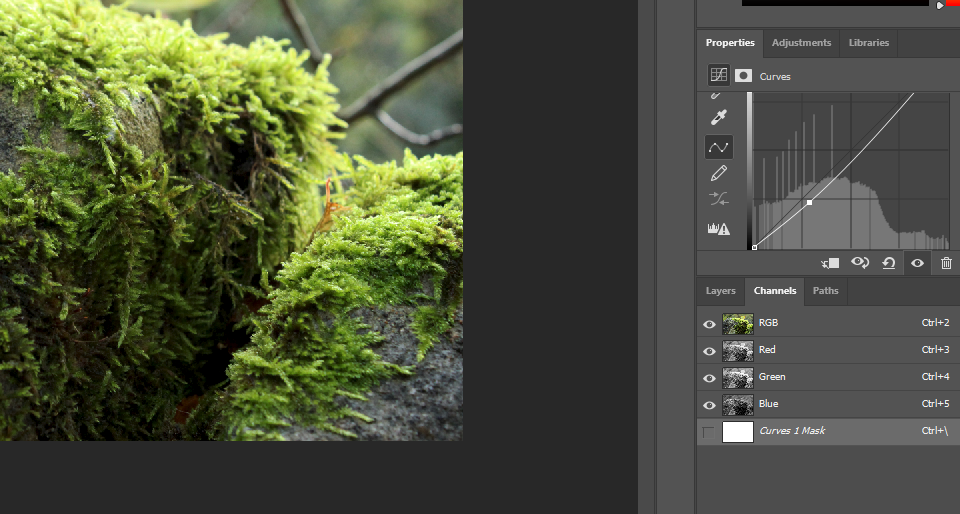
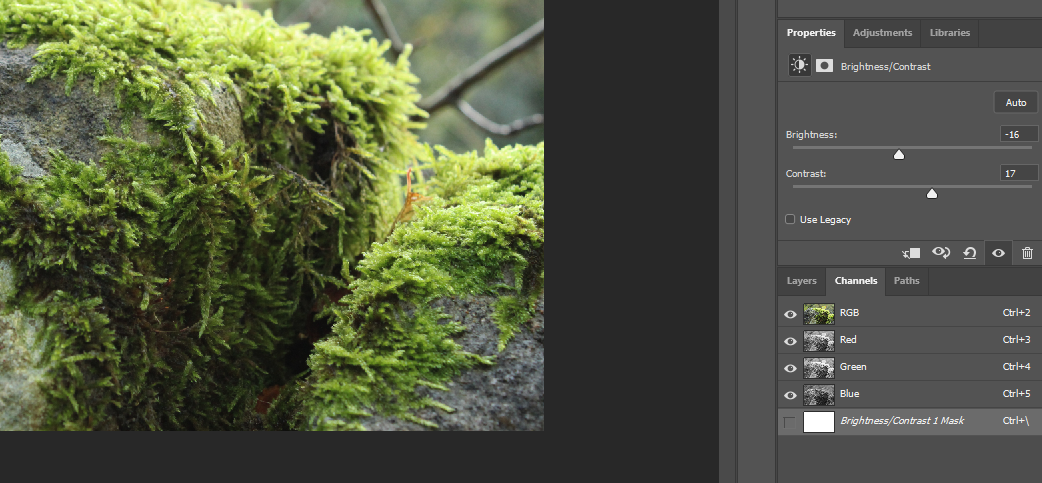
Developments
This was my first attempt at using photoshop to alter my images. I do not think I was very imaginative and I played it safe with experimenting. It is very clear that the main change to the image is the brightness. That was my goal as the picture beforehand looked very cold and boring. The colour of the moss is also more saturated which makes the photo more eye-catching. I need to start experimenting with more advanced photoshop techniques to bring my work to a higher standard.
Original photo

Result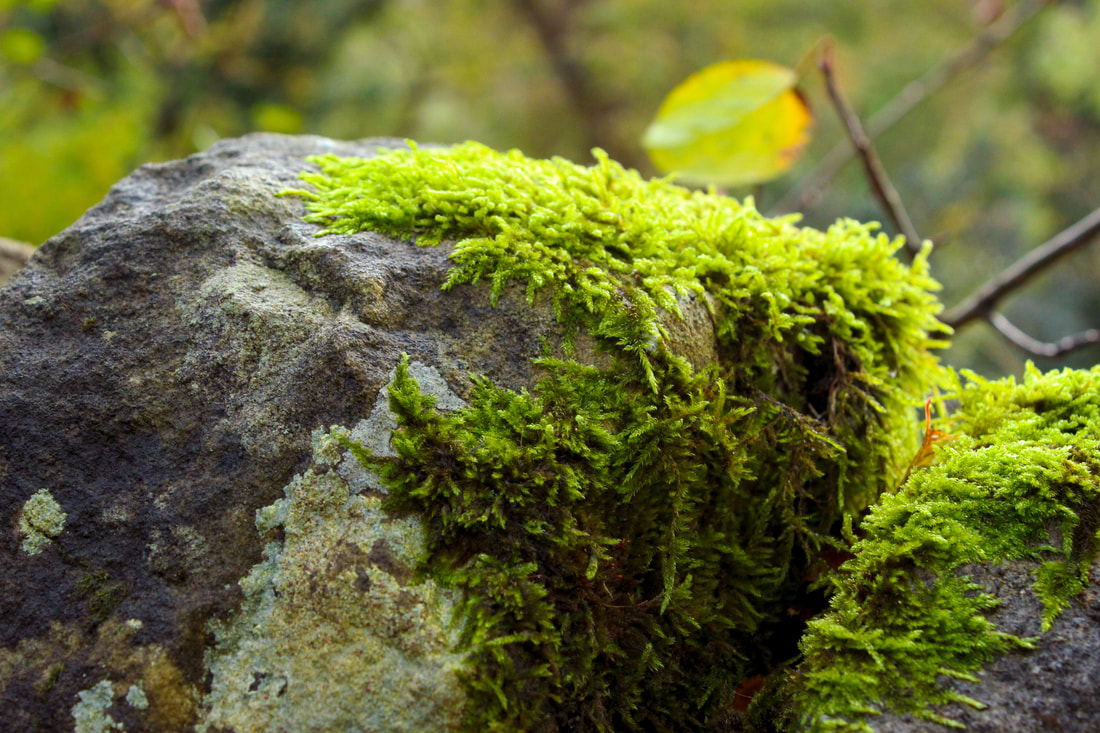
|
|
|
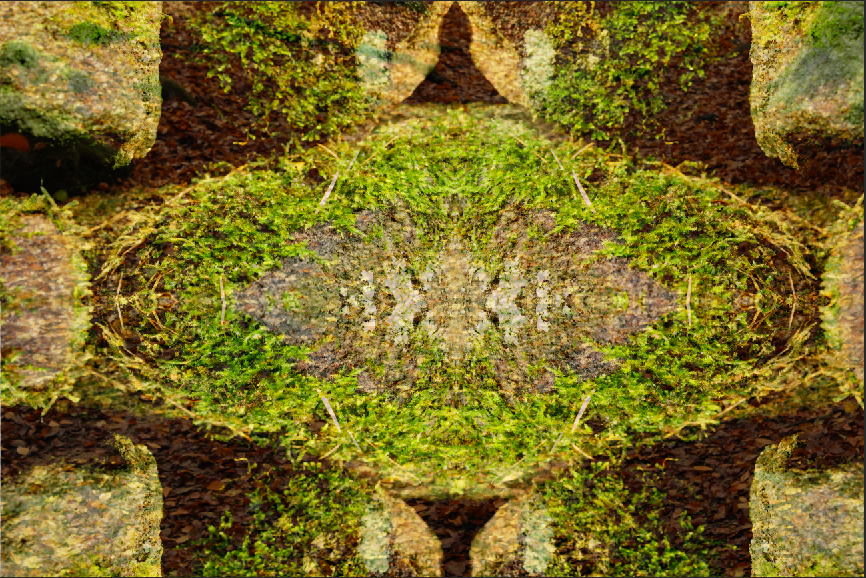
Developments
The leaves overlaying the top of the rocks in the final image create a sort of vintage essence. You cannot immediately tell that it is leaves that are causing the grainy effect, so it opens an opportunity for you to explore the image more. The green that surround the light in the middle of the image creates a sense of vibrancy that I highlighted using the contrast and exposure tools.
Original Images |
|


Final Image
Sky


Best and Worst

In my opinion, this is my best image. The clear blue sky is a very nice contrasting background to the orange of the leaves and the darkness of the branches. The ISO was set to about 200, so everything closest to the camera is a little dark, but that makes the blue stand out and therefore the lighting from the sun makes everything else stand out.
|
In my opinion, this is my worst image. Everything is extremely over exposed. I could have set the ISO to a lower setting and changed the White Balance, so everything could adjust to the natural lighting of the environment.
|
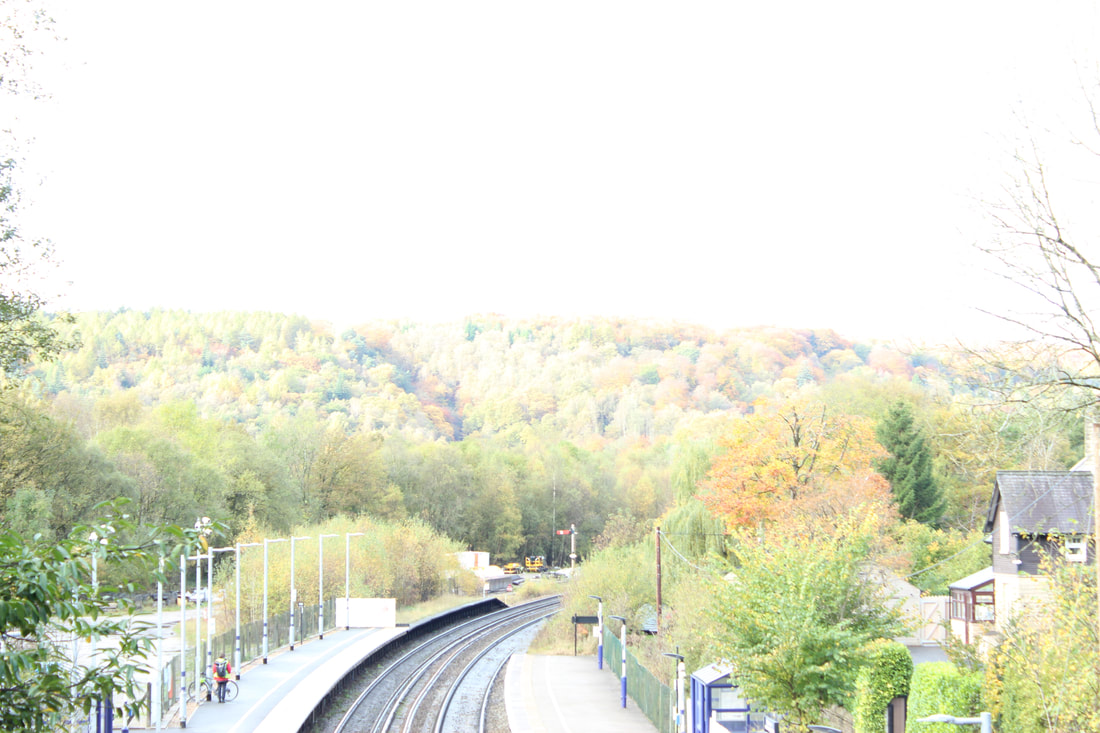
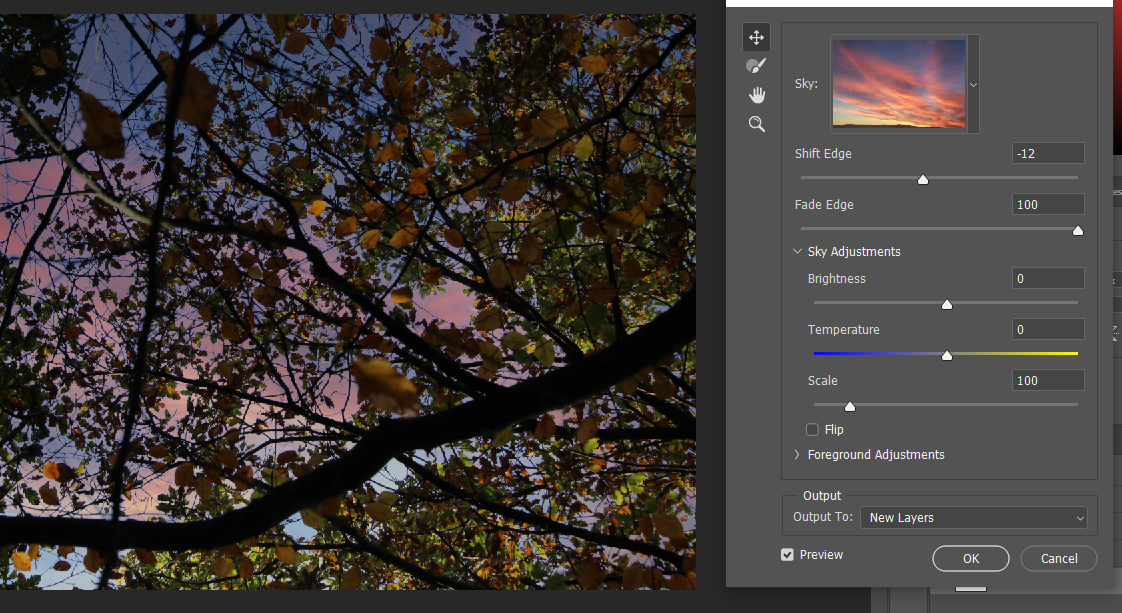
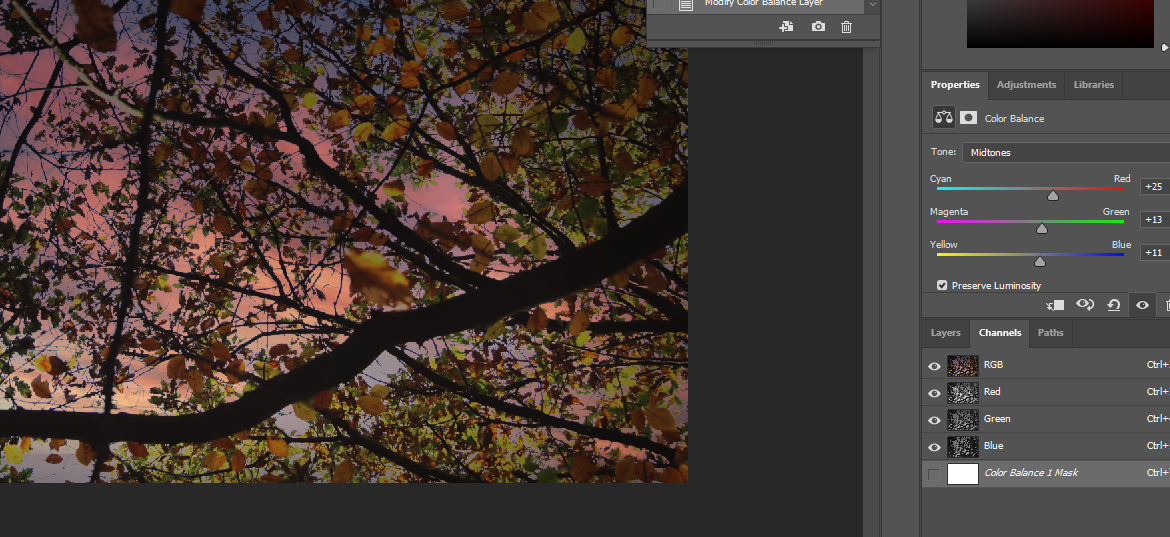
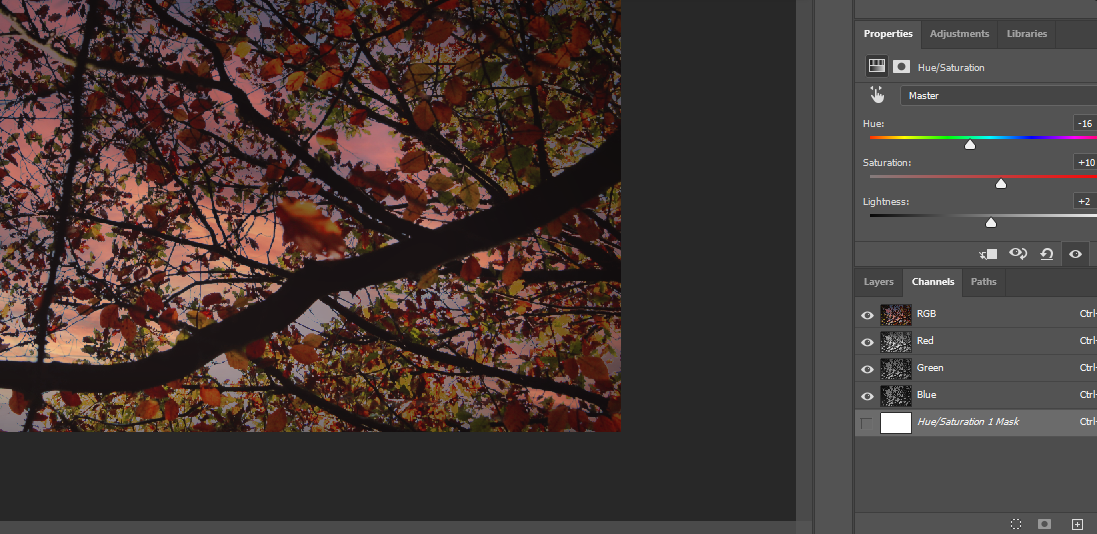
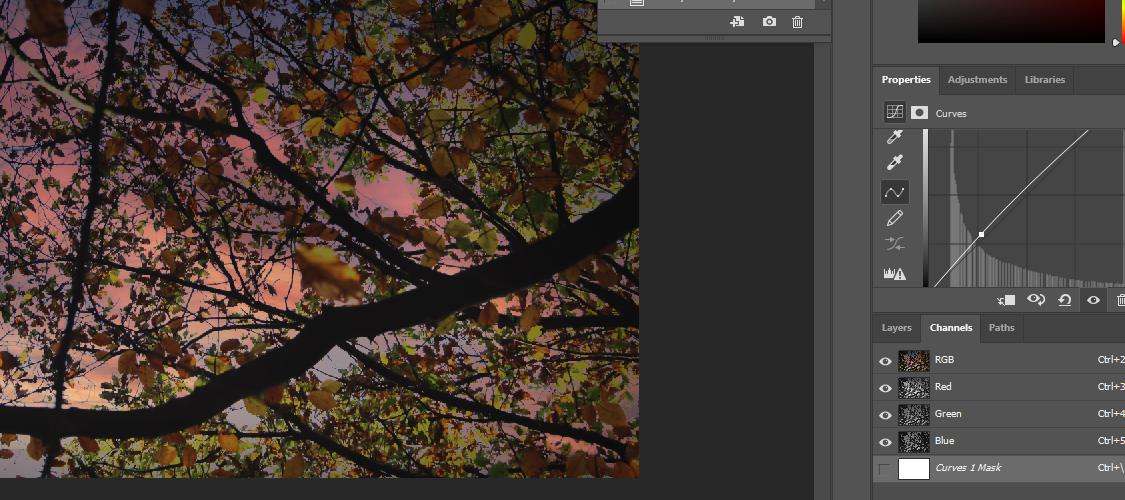
Developments
I have used this photoshop tutorial to further my knowledge of using the app. I have not used photoshop a lot, but the features really help advance my photos. I really like the sky replacement feature as the sky is normally in the background and it is important in highlighting the subject that is the main focus of the picture. I am getting comfortable with using all of the tools in the 'Layer' drop down menu. Adjusting the brightness and contrast is now my first job whenever editing one of my pictures.

Original photo
Result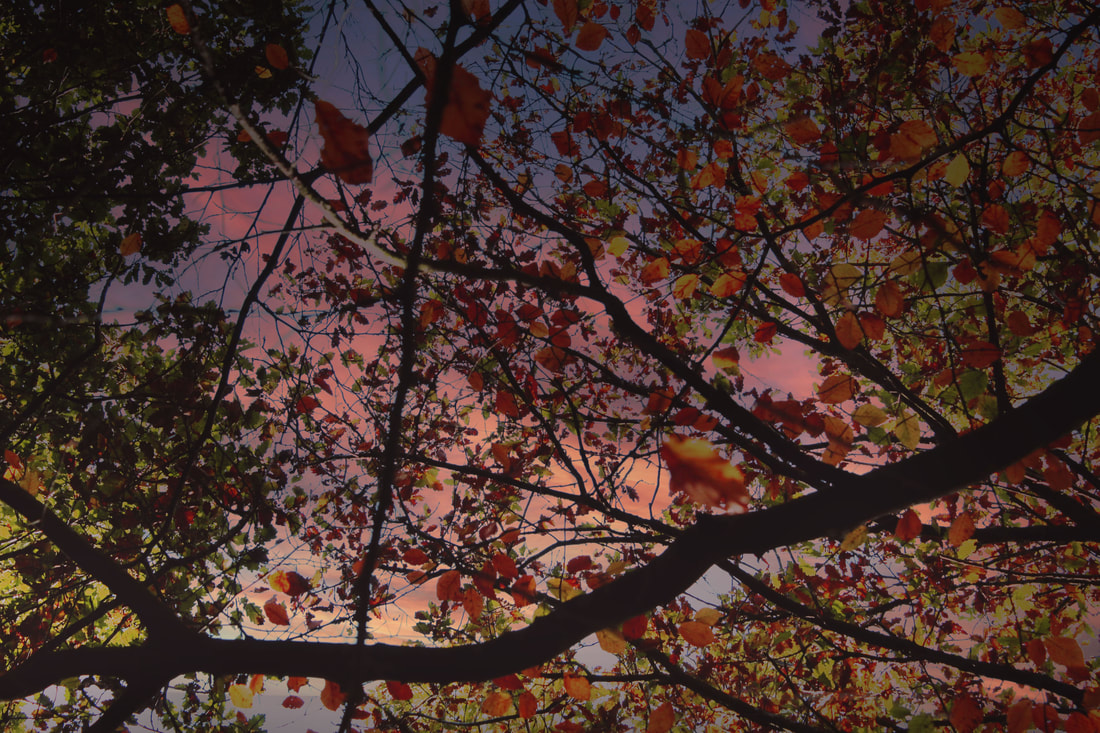
|
|
|
Water


Best and Worst
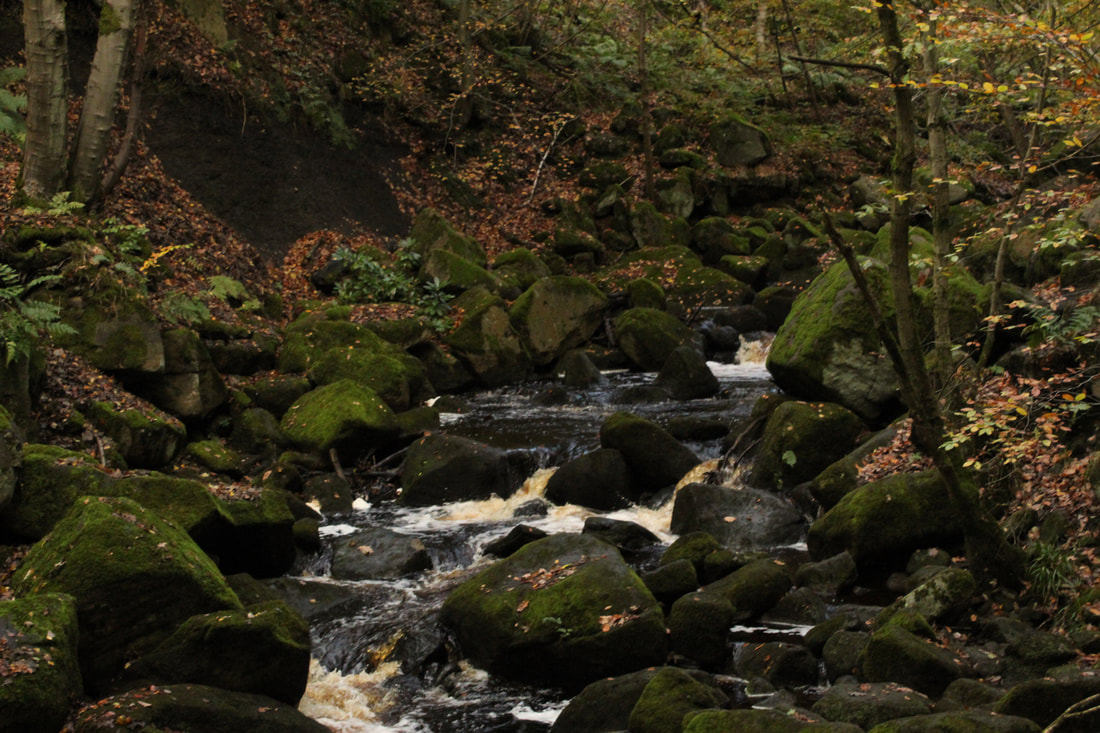
In my opinion, this is my best image. I really like the composition and the angle of how I took the photo. It has a bit of a dark undertone, which I think adds to it as the green moss and the white rapids in the water stand out more. I like how everything in the picture has the same lighting because that means your eye does not just focus on one thing, it makes them travel around the picture.
|
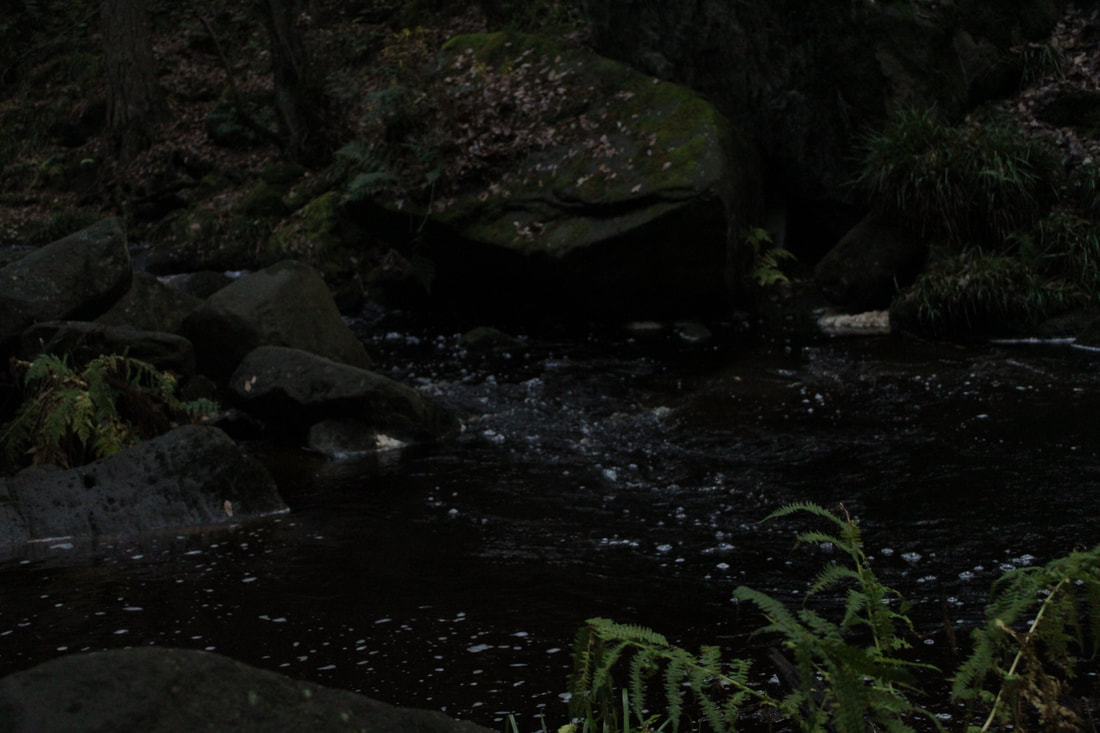
In my opinion, this is my worst image. The White Balance is completely off and you cannot see the ripples in the water (which is what I was trying to capture). I do not like how cropped the image is; I feel like it should have been more of a wide shot.
|
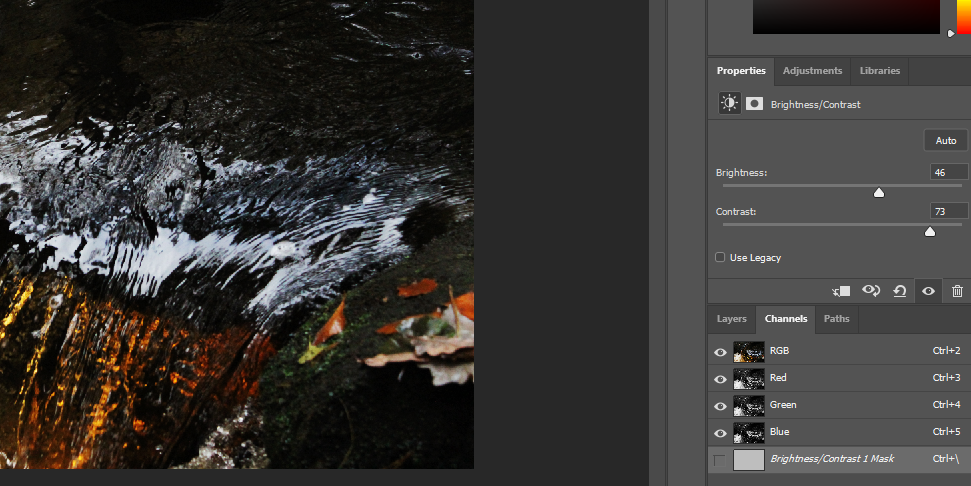
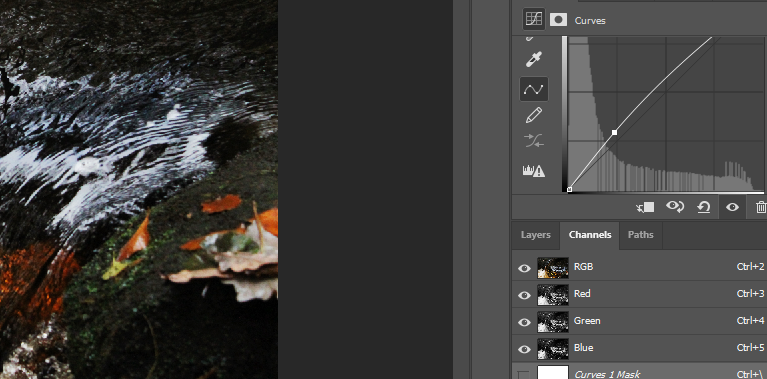
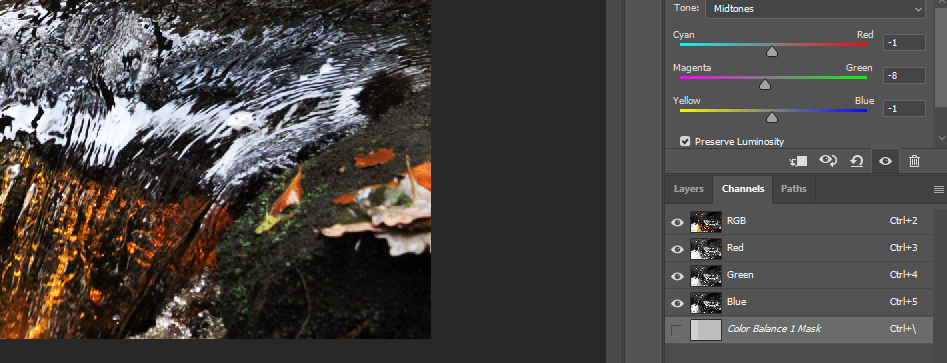
Developments
I don't really like this development. The original picture is quite nice, but I have not done a lot of amendments in photoshop. I only explored with the lighting. I used the curve tool and exposure to turn the yellow rapids into more of a gold colour. I could have layered another image than has a more rough texture over the top of this one to create a better final outcome.
Original photo
Result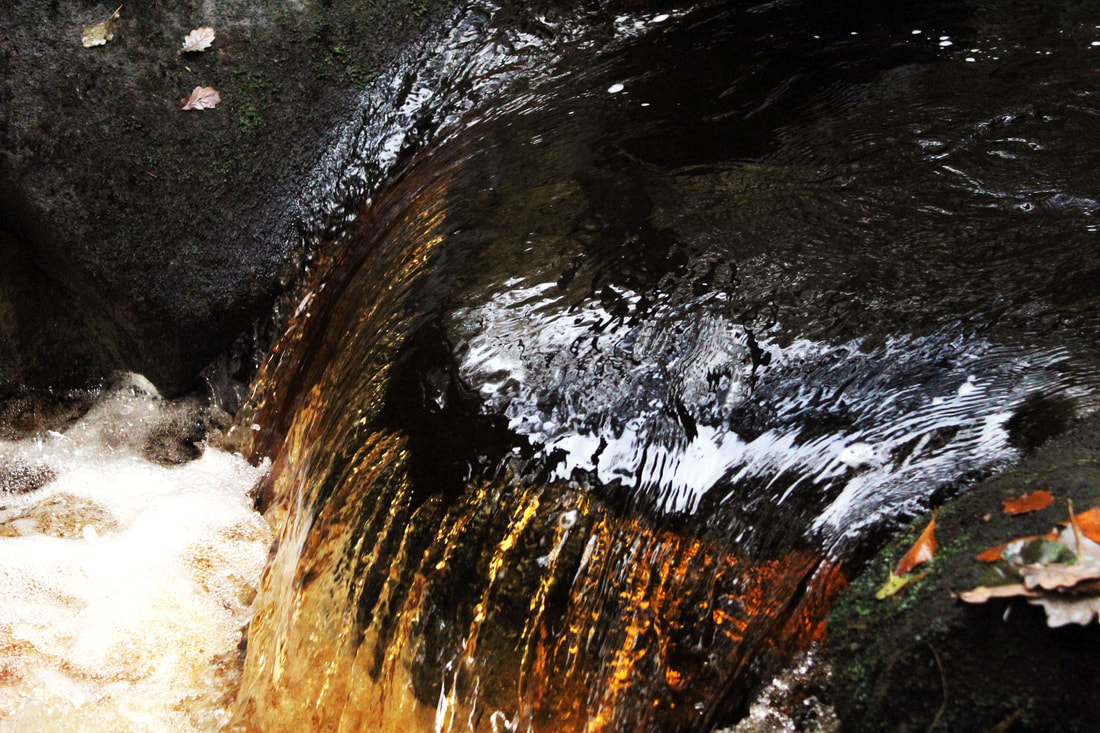
|
|

|
Trees, Leaves & Bushes


Best and Worst

In my opinion this is my best image. I love the saturation and how all of the autumn colours stand out. I prefer an image like this to be tightly cropped as the group of mushrooms are the center of attention. The lens was very close so it allows you to see the jagged edges of the log and the curves of the mushrooms. The rule of thirds may have been relevant in this image also.
|
In my opinion, this is my worst image. I could have set the ISO to a higher setting and the White Balance to a more natural setting. The aperture could have been set to a higher setting, so the trees would not completely blur the hill and sky in the background.
|
Developments
The vibrance of the autumn colours really stand out against the grey surface of the bubblewrap. The bubblewrap creates a sort of wavy texture on top of the scratchy bark. The edge of the image creates leading lines and the bright green leaves point towards where your eyes will follow the lines. I like the percentage I set the opacity on as the bubblewrap does not dominate the final outcome, but you can still see the undertones.
Original Images |
|


Final Image

Original Image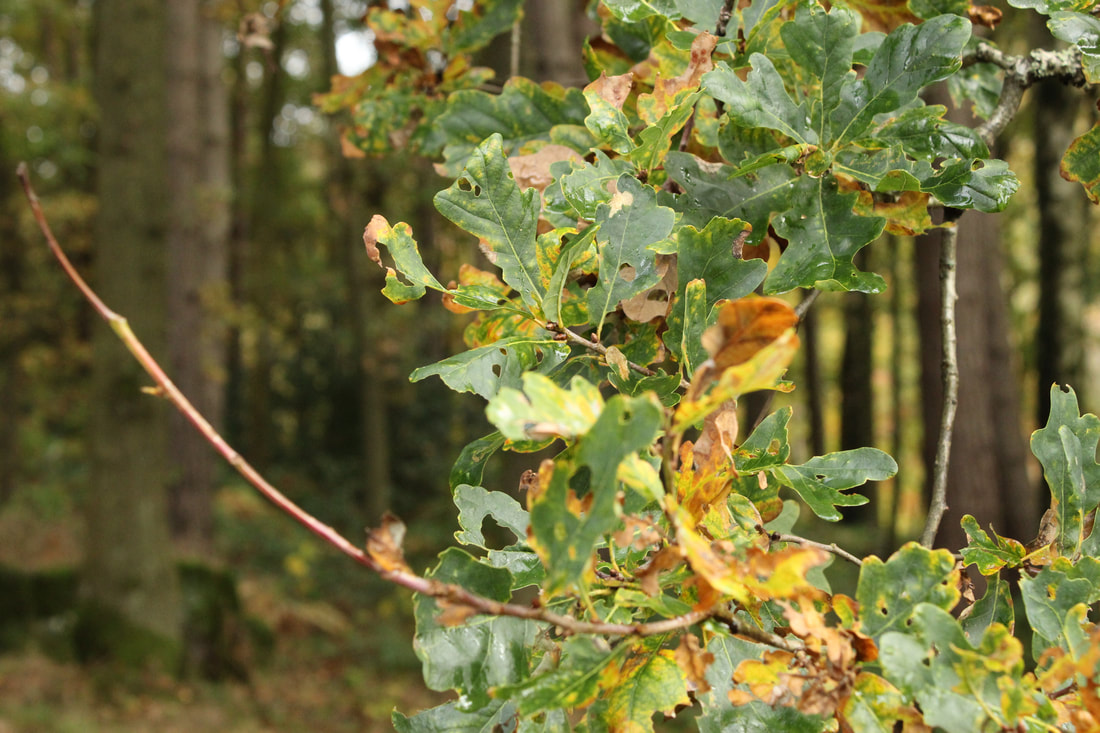
|
|


Final Image

Stone


Best and Worst

In my opinion, this is my best image. I really like the angle and how it is slightly looking up towards the stone structure. I enjoy how it looks like the trees and bushes are encasing the structure. I like how the image does not have a shallow depth of field, as the lack of one makes almost everything in the picture eye-catching.
|

In my opinion, this is my worst image. Nothing is in focus due to the aperture on the incorrect setting (as this was one of the first photos I took in Padley Gorge). The composition is very off; the tunnel should be directly in the center of the image. Part of the wall that the camera was resting on is still in shot, which clearly was not my intention.
|
People


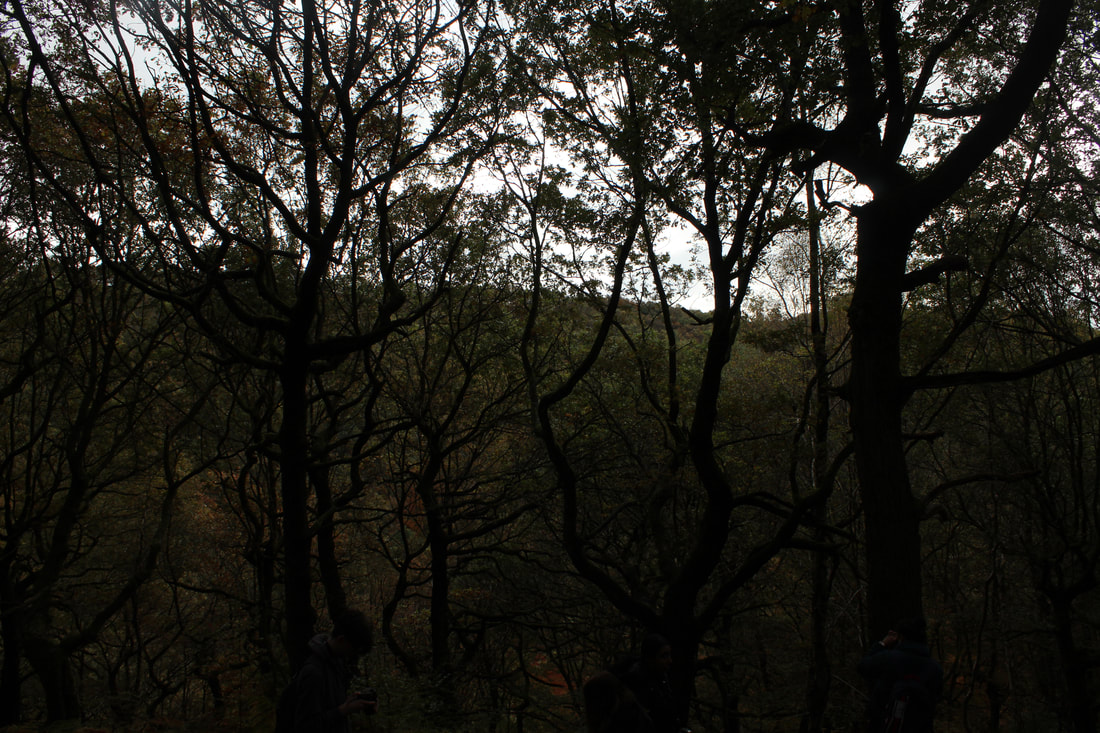
Best and Worst

In my opinion, this is my best image. The shadows casting on the ground from the tree tops is a very nice touch. I like the placement of the group of people and how the trees are surrounding them. I like the setting of the ISO and White Balance and how they add a warm undertone, which makes the leaves stand out.
|

In my opinion, this is my worst image. I do not like the composition. The mud is already a dark shade, so I should have set the ISO a little higher. I was aiming for the boot to be the subject of the image, but I feel like that would have been accomplished if the boot was in the center.
|
Final Gallery

Evaluation
My main theme was different textures and exploring all of the places texture could be examined, such as in nature with tree bark or moss on rocks. However man-made elements were also explored such as bubblewrap or pieces of glass. I thought the natural aspect of the 'Texture' theme was good as it allowed me to go on location and expand my limit of capturing enthralling pictures. I believe that once I arrived to the photoshop stage in the project, my creativity really shined as I was able to link one image with another to create a brand new texture.
I found that taking photos was the most enjoyable part of this project. I don't think spending all of your time on a computer manipulating your pictures in photoshop is what photography is about. I believe that developing my skills using the actual camera is the most interesting and important aspect. Going out on location and investigating places I have never seen before was also interesting because in Padley Gorge there is bound to be something with texture that you would not find in a bustling city like Manchester.
Building my Weebly website to ensure professionalism in my work is not a skill I would have thought to use if I did not take photography. Making sure my photos are all in a matching order and under the right subheadings definitely improved my organizational skills. I have also learnt the kaleidoscope technique of adding layers of one image, flipping them horizontal and vertical and the finishing image is a product of symmetry. I learnt that technique using a tutorial provided by the school and it did not take long to master. My knowledge of a manual camera has improved as well as I now know when it appropriate to change the ISO or White Balance. All the these things I have learnt I will carry to help with future projects.
I would like to develop my photoshop skills. During this project, I have had some trouble applying more advanced techniques in photoshop, but I am hoping in future projects I will be able to switch up my final galleries and use something like double exposure.
I have tried to incorporate some black and white finishes in to my photos as a couple of photographers I researched were Edward Weston and Ansel Adams. Those two photographers like to explore with shadows, which is something I find very enticing. The third photographer I researched was Sandra Bartocha. I used inspiration from her, mainly during the Padley Gorge trip as a lot of her work is connected to colours of the outside world. Her work is quite abstract in the way that the colours in her photos all blend together and create a smooth finish. The kaleidoscope technique was a way of directly linking my work to hers as the final outcomes in photoshop mostly always came out looking very abstract.
The photography technique that I enjoyed the most was getting to use the camera on manual mode. This was one of the most entertaining things for me as it was something that allowed me to grow more confidence with my work. Going into photography, using a real Canon camera was not something that I was familiar with. However, as time has gone on holding one of them makes me feel very professional and brings a sense of realism to everything that I have done because I am responsible for everything that I learn and every image that I take.
I feel as though the most successful part of this project was the photoshoot I did involving man-made objects(chains, chess pieces, glass etc). Out of all of the inside shoots that I have done over this project that one in my opinion, looks the most professional. The images of the chains specifically have given me the chance to make great final outcomes in photoshop by layering them on top on another image-this is similar with the images of the bubblewrap. That shoot was the indicator that I was becoming more confident and efficient with what I was doing.
When starting out, I did find some problems in making sure the camera settings were all correct. There were many instances where I had taken a multitude of photos and the majority of them came out either unfocused, dark or overexposed. Beginning to use photoshop was also a bit of a challenge because I was not familiar with the tools at all. Although, these difficulties I encountered made me feel proud of my work later in the project as I was able to see how far I had come.
I was bound to learn a lot of things on this journey, both technologically and environmentally. Researching things about photographers and how they work was the beginning of my own adventure of how I would make my photography my own. Whenever I had taken pictures of anything in the past it was always on my phone, so using a manual camera for the first time was a big step. Being able to explore places such as Padley Gorge with that camera was a privilege as I am fascinated by nature and being out they helped me learn how to make people fascinated by my picture. I was hesitant about learning to use photoshop because I did not know if I was confident enough to know how to make my images better, but I am glad that refining images is a part of the course as it gives me a chance to enlarge my creativity.
If I were to do this project again I would probably go into it with more independence. For example, going to more locations in my own time to capture things instead of just doing that for homework. Refining my writing in my own time would also have been very helpful as lessons can often fly past and I won't have time to finish it to a standard that I set for myself. Overall, the changes I would make would be based on taking action into my own hands and making my photography more personal to me. Generally, I am very proud of the journey I have been on so far and I am excited to become more advanced.
